Step 1
Begin a class discussion about staying healthy on Earth.
Responses should include things like eating nutritious foods, exercising, not smoking, etc. Compare and contrast this to being healthy in space. Students should identify that the same things are important for astronauts.
On long-duration missions, astronauts aboard the ISS must exercise approximately two hours a day! Ask students to share their ideas about how astronauts exercise in space. Watch the following video for David Saint-Jacques’s explanation of physical activity aboard the ISS:
After watching the video, discuss the following questions as a class:
- Why is exercising in space essential for astronauts?
- What three pieces of exercise equipment are used on the ISS?
- How is the stationary bicycle on the ISS different than a stationary bicycle on Earth?
- How are astronauts able to run on the ISS treadmill without floating away?
Step 2
Explain to students that in the next micro:bit activity, they will be using a sensor called an accelerometer.
In preparation, have students answer the questions below in small groups or as a class:
- What does “acceleration” mean? (A: Acceleration is a change in velocity with respect to time.)
- What do you think an accelerometer measures? (A: An accelerometer measures acceleration.)
- In what devices might you find an accelerometer? (A: Accelerometers can be found on devices such as smartphones and step counters.)
- What do we call devices that sense changes in the environment? (A: Devices that detect or sense changes in the environment are called sensors.)
- How would an astronaut know how far she/he had run on the treadmill? (A: Sensors on the treadmill sense the force of each impact. This is recorded as a “step.” The distance between “steps” on the treadmill can be measured).
Step 3
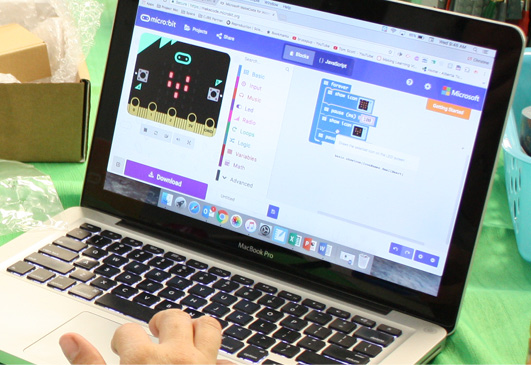
Students will now learn how to code a step-counter using MakeCode and the accelerometer that is built into the micro:bit.
Go to http://makecode.microbit.org/ or open the micro:bit app.
Open a New Project

Instructions for this coding activity are in the video as well as below.
- Step Counter guided material
Part 1: Counting Steps
Delete the on start block and the forever block.
First you will need to create a variable.
Under Variables, select Make a Variable
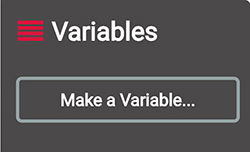
Type in the name steps and click on the Ok button.

You will now see that you have a variable called steps.

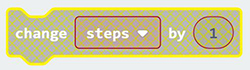
Under Variables, click and drag a change item by block onto the screen.
You will note that it is shaded out at this point.
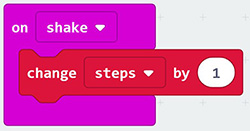
Under Input, select the on shake block and drag it on to the screen. Click on the change steps by block and snap it into the on shake block.

If you click on the small downward arrow beside the word steps you will see that the variable steps is checked.
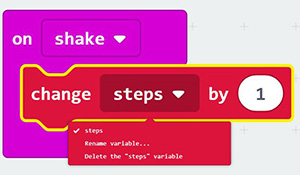
Now every time you shake the micro:bit it will increase the number of steps by 1.
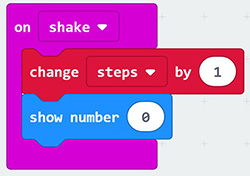
But there is no way yet to see the number of steps. For this you need to add code to display a number.
Under Basic, click and drag a show number block onto the screen and place it under the change steps by 1 block.
Under Variables, click and drag the steps variable block onto the screen and snap it into the show number block where the 0 is.
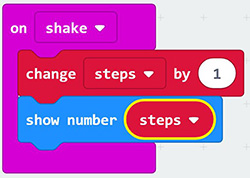
Notice how the steps variable is shaped like a puzzle piece that fits into the show number block.
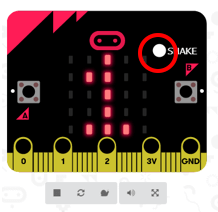
You can test out the code using the virtual micro:bit beside your working area by clicking on the white circle beside the word SHAKE. You should see the number go up by one each time you click SHAKE.
Save your work and upload the code to the micro:bit.
Part 2: Showing a Message
In this next part, you will add a way to give the user an encouraging message.
Under Input select the on button A pressed block and drag it into the empty space on your working area.

Did you know?
In coding, a “string” is a sequence of characters that can contain letters, numbers and punctuation.
Under Basic, select the show string block and snap it into the on button A pressed block.

Change the word “hello!” in the show string block to a word or phrase of encouragement, such as “Keep going!”
You can test this to see if it works by clicking on the A button on the micro:bit simulator. You should see the words scrolling across the screen.

Duplicate the show number block from Part 1 by right-clicking on the block and selecting Duplicate from the top of the menu. Drag the block so that it is beneath the show string block.

Save your work and upload the code to the micro:bit.
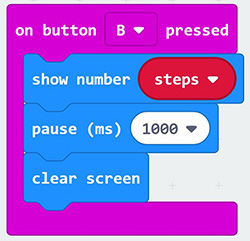
Part 3: Clearing the Screen
Under Input, select the on button A pressed block and drag it into an empty space on your working area. In the pull-down menu, change on button “A” pressed to on button “B” pressed.
Duplicate the show number block from Part 1 by right-clicking on the block and selecting Duplicate from the top of the menu. Snap it into the on button B pressed block.
Under Basic, select the pause (ms) block and place it beneath the show number block. Adjust the value to 1000 ms.

Under Basic and …More select the clear screen block. Snap it in beneath the pause block.
Save your work and upload the code to the micro:bit.
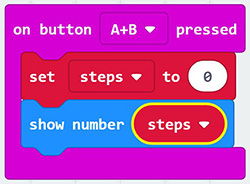
Part 4: Resetting the Step Counter
Under Input, select the on button A pressed block and drag it into the empty space on your working area. In the pull-down menu, change on button “A” pressed to on button “A+B” pressed.
To have the display reset to 0, under Variables, select the set item to block and snap it into the on button “A+B” pressed block.
Change item to steps using the drop-down menu.
To display the value 0 to the user, duplicate the show number block from Part 1. Drag the block so that it is beneath the set steps to block.
You can test this to see if it works by clicking A+B button on the simulator. A zero (0) should be displayed.
Step 4
Extend student learning related to the step-counter activity by having students research wearable technologies and their use by astronauts.
For example, watch the video below in which David Saint-Jacques explains the Canadian Bio-Monitor smart shirt system:
Students can turn their micro:bits into wearable step-counters. For this activity, they would need to use the micro:bit battery pack, as well as additional material such as:
- Scissors
- Washi or duct tape
- Velcro circles
- Decorative stickers, gems, etc
Students can follow a Design & Build process to create their wearable step-counters.
- If students create wearable step-counters, they could use them during physical activity time to assess their durability and comfort.
- If students create wearable step-counters, they could predict the number of steps before doing a physical activity and then check their results when done. How close were their predictions?