Design & Build an Insulated Food Container
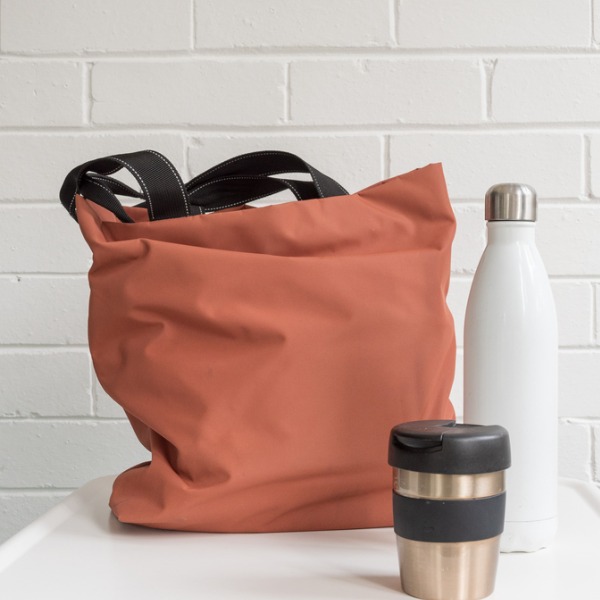
Insulated food containers (natalie_board, iStockphoto)

Insulated food containers (natalie_board, iStockphoto)
How does this align with my curriculum?
| Grade | Course | Topic |
|---|
Students will design and build a prototype of a device to keep food cold for a specified time.
Overview
| Activities | Timing | Student Grouping | Description |
|---|---|---|---|
| Minds-On: Research and Understand the Problem | 20 minutes | Large group | Students will learn/review the characteristics of insulators and will look at examples of good insulators. They will also activate prior knowledge of the negative environmental impacts of using certain materials. |
| Action: Design, Build and Test and Share a Prototype | 40 minutes | Small group | Students will design, build and test a device that keeps food cold for a specified time. |
| Consolidation: Analyzing the Results | 20 minutes | Whole class Small group | Students will review class data from prototype testing and consider which design features worked well in preventing heat transfer. |
This lesson can be done over a few days.
Students will:
- Use their knowledge of heat transfer and insulation to create a container that keeps heat transfer to a minimum
- Use a collaborative engineering design process and associated skills to safely design and build a structure
- Understand that the use of insulating materials can have a negative environmental impact
Learning Goals
Students will:
- Use their knowledge of heat transfer and insulation to create a container that keeps heat transfer to a minimum
- Use a collaborative engineering design process and associated skills to safely design and build a structure
- Understand that the use of insulating materials can have a negative environmental impact
Students can:
- Identify the potential sources of heat transfer from insulated food containers
- Successfully create an insulated food container that meets established criteria
- Identify environmental issues associated with use of single use takeout food containers
- Take into consideration both the insulating properties as well as the environmental impacts of their chosen building materials. (Optional)
Success Criteria
Students can:
- Identify the potential sources of heat transfer from insulated food containers
- Successfully create an insulated food container that meets established criteria
- Identify environmental issues associated with use of single use takeout food containers
- Take into consideration both the insulating properties as well as the environmental impacts of their chosen building materials. (Optional)
This icon indicates potential assessment opportunities
Observations
- Observe and record anecdotally students’ ability to actively listen and share ideas during large group discussions (Minds-on).
- Observe and record anecdotally students' ability to follow an engineering design process (Action).
- Observe and record using audio or video how students plan to go about building their insulated food containers (Action).
- Observe and record students’ safe use of tools and materials (Action).
Conversations
- Talk with students about their design sketches. Encourage students to describe their sketches in words and explain how their ideas meet the design criteria (Action).
- Talk with students about the process of building their insulated food containers, including challenges they encountered and how they overcame them (Consolidation).
Products
- Review student notes and drawings that are part of the Design Planning Journal (Action).
- Conversations about finished prototypes is captured in the Keeping it Cold: Single Point Rubric (Consolidation).
Evidence of Student Learning
This icon indicates potential assessment opportunities
Observations
- Observe and record anecdotally students’ ability to actively listen and share ideas during large group discussions (Minds-on).
- Observe and record anecdotally students' ability to follow an engineering design process (Action).
- Observe and record using audio or video how students plan to go about building their insulated food containers (Action).
- Observe and record students’ safe use of tools and materials (Action).
Conversations
- Talk with students about their design sketches. Encourage students to describe their sketches in words and explain how their ideas meet the design criteria (Action).
- Talk with students about the process of building their insulated food containers, including challenges they encountered and how they overcame them (Consolidation).
Products
- Review student notes and drawings that are part of the Design Planning Journal (Action).
- Conversations about finished prototypes is captured in the Keeping it Cold: Single Point Rubric (Consolidation).
Students will:
- Use their knowledge of heat transfer and insulation to create a container that keeps heat transfer to a minimum
- Use a collaborative engineering design process and associated skills to safely design and build a structure
- Understand that the use of insulating materials can have a negative environmental impact
Learning Goals
Students will:
- Use their knowledge of heat transfer and insulation to create a container that keeps heat transfer to a minimum
- Use a collaborative engineering design process and associated skills to safely design and build a structure
- Understand that the use of insulating materials can have a negative environmental impact
Students can:
- Identify the potential sources of heat transfer from insulated food containers
- Successfully create an insulated food container that meets established criteria
- Identify environmental issues associated with use of single use takeout food containers
- Take into consideration both the insulating properties as well as the environmental impacts of their chosen building materials. (Optional)
Success Criteria
Students can:
- Identify the potential sources of heat transfer from insulated food containers
- Successfully create an insulated food container that meets established criteria
- Identify environmental issues associated with use of single use takeout food containers
- Take into consideration both the insulating properties as well as the environmental impacts of their chosen building materials. (Optional)
This icon indicates potential assessment opportunities
Observations
- Observe and record anecdotally students’ ability to actively listen and share ideas during large group discussions (Minds-on).
- Observe and record anecdotally students' ability to follow an engineering design process (Action).
- Observe and record using audio or video how students plan to go about building their insulated food containers (Action).
- Observe and record students’ safe use of tools and materials (Action).
Conversations
- Talk with students about their design sketches. Encourage students to describe their sketches in words and explain how their ideas meet the design criteria (Action).
- Talk with students about the process of building their insulated food containers, including challenges they encountered and how they overcame them (Consolidation).
Products
- Review student notes and drawings that are part of the Design Planning Journal (Action).
- Conversations about finished prototypes is captured in the Keeping it Cold: Single Point Rubric (Consolidation).
Evidence of Student Learning
This icon indicates potential assessment opportunities
Observations
- Observe and record anecdotally students’ ability to actively listen and share ideas during large group discussions (Minds-on).
- Observe and record anecdotally students' ability to follow an engineering design process (Action).
- Observe and record using audio or video how students plan to go about building their insulated food containers (Action).
- Observe and record students’ safe use of tools and materials (Action).
Conversations
- Talk with students about their design sketches. Encourage students to describe their sketches in words and explain how their ideas meet the design criteria (Action).
- Talk with students about the process of building their insulated food containers, including challenges they encountered and how they overcame them (Consolidation).
Products
- Review student notes and drawings that are part of the Design Planning Journal (Action).
- Conversations about finished prototypes is captured in the Keeping it Cold: Single Point Rubric (Consolidation).
Materials and Preparation
| Material/Technology/Setting | Quantity |
|---|---|
*Note: Beverages with sugar can have a different temperature in the experiment than beverages without sugar. Try to get all of the same kind. |
1 per group |
|
For teacher use |
Materials
| Material/Technology/Setting | Quantity |
|---|---|
*Note: Beverages with sugar can have a different temperature in the experiment than beverages without sugar. Try to get all of the same kind. |
1 per group |
|
For teacher use |
- Collect the materials that students will use to construct their prototypes. Pre-cut any materials that are not safe or practical for students to cut in the classroom.
- Demonstrate how to safely and correctly use all the tools that are provided.
- Familiarize yourself with the Design & Build (Engineering design) process since students will be using this throughout the lesson.
- Set a date ahead of time for students to bring pop in and ensure students label their pop with their names and your name.
- Place all of the cans of pop into the fridge at least 2 days prior to doing the Actions part of the lesson to ensure they all have the same initial temperature.
- On testing day, clean and sanitize a thermometer, as it will make contact with food for consumption. Ensure the thermometer is calibrated and gives an accurate reading.
Preparation
- Collect the materials that students will use to construct their prototypes. Pre-cut any materials that are not safe or practical for students to cut in the classroom.
- Demonstrate how to safely and correctly use all the tools that are provided.
- Familiarize yourself with the Design & Build (Engineering design) process since students will be using this throughout the lesson.
- Set a date ahead of time for students to bring pop in and ensure students label their pop with their names and your name.
- Place all of the cans of pop into the fridge at least 2 days prior to doing the Actions part of the lesson to ensure they all have the same initial temperature.
- On testing day, clean and sanitize a thermometer, as it will make contact with food for consumption. Ensure the thermometer is calibrated and gives an accurate reading.
- Some understanding of insulators and conductors is an asset
- Understanding of how heat is transferred through conduction, convection and radiation.
- Understanding of the role of insulation in preventing heat transfer
Student Prior Knowledge and Skills
- Some understanding of insulators and conductors is an asset
- Understanding of how heat is transferred through conduction, convection and radiation.
- Understanding of the role of insulation in preventing heat transfer
| Material/Technology/Setting | Quantity |
|---|---|
*Note: Beverages with sugar can have a different temperature in the experiment than beverages without sugar. Try to get all of the same kind. |
1 per group |
|
For teacher use |
Materials
| Material/Technology/Setting | Quantity |
|---|---|
*Note: Beverages with sugar can have a different temperature in the experiment than beverages without sugar. Try to get all of the same kind. |
1 per group |
|
For teacher use |
- Collect the materials that students will use to construct their prototypes. Pre-cut any materials that are not safe or practical for students to cut in the classroom.
- Demonstrate how to safely and correctly use all the tools that are provided.
- Familiarize yourself with the Design & Build (Engineering design) process since students will be using this throughout the lesson.
- Set a date ahead of time for students to bring pop in and ensure students label their pop with their names and your name.
- Place all of the cans of pop into the fridge at least 2 days prior to doing the Actions part of the lesson to ensure they all have the same initial temperature.
- On testing day, clean and sanitize a thermometer, as it will make contact with food for consumption. Ensure the thermometer is calibrated and gives an accurate reading.
Preparation
- Collect the materials that students will use to construct their prototypes. Pre-cut any materials that are not safe or practical for students to cut in the classroom.
- Demonstrate how to safely and correctly use all the tools that are provided.
- Familiarize yourself with the Design & Build (Engineering design) process since students will be using this throughout the lesson.
- Set a date ahead of time for students to bring pop in and ensure students label their pop with their names and your name.
- Place all of the cans of pop into the fridge at least 2 days prior to doing the Actions part of the lesson to ensure they all have the same initial temperature.
- On testing day, clean and sanitize a thermometer, as it will make contact with food for consumption. Ensure the thermometer is calibrated and gives an accurate reading.
- Some understanding of insulators and conductors is an asset
- Understanding of how heat is transferred through conduction, convection and radiation.
- Understanding of the role of insulation in preventing heat transfer
Student Prior Knowledge and Skills
- Some understanding of insulators and conductors is an asset
- Understanding of how heat is transferred through conduction, convection and radiation.
- Understanding of the role of insulation in preventing heat transfer
Teaching and Learning Activities
This icon indicates potential assessment opportunities
Minds-On: Research and Understand the Problem (10 minutes)
| Instructions | Teaching Tips |
|---|---|
|
In order to keep hot foods hot and cold foods cold, food containers must be designed to prevent the 3 methods of heat transfer. Activate prior knowledge by having students share what they know about methods of heat transfer (conduction, convection and radiation). Review these methods using the first slide of the slide of the Preventing Heat Transfer slideshow [Google slides] [pptx] [PDF]. 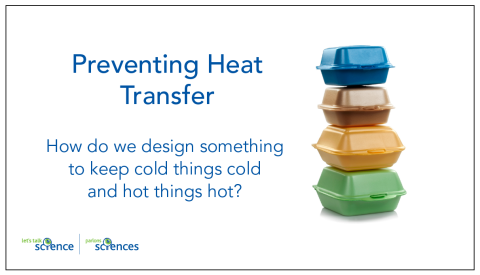
Continuing with the slides, explain to students how the design features of an insulating flask or thermos prevents various methods of heat transfer. Review the difference between insulators and conductors and ask students which material would work best for keeping something the same temperature. Discuss examples of insulators and conductors. Ask students to consider the environmental impact of using different insulating materials (e.g., can the material break down naturally (biodegrade), is the material made from harmful chemicals, etc.). |
LanguageCreate a word wall of important terms and their definitions from the slideshow, |
Action: Design, Build, Test and Share Prototype (40-50 minutes)
| Instructions | Teaching Tips |
|---|---|
|
Organise students into pairs or small groups. Students could also do this task individually. Provide students with a copy of the Keeping it Cold: Design Planning Journal reproducible [Google doc] [Word doc] [PDF]. 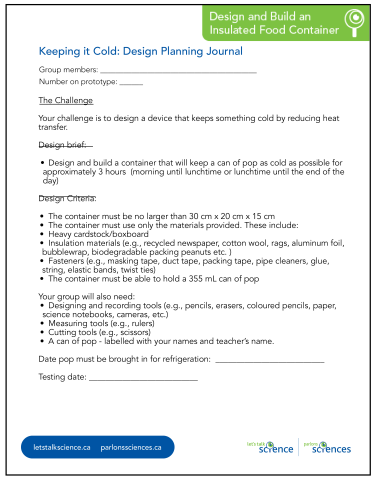
Review the various sections with students and what you expect them to complete in each. Encourage the students to use the checklists on each page to track their progress. Also provide students with the Keeping it Cold: Single Point Rubric reproducible [Google doc] [Word doc] [PDF] and review the criteria listed in the centre column. Their prototypes will be assessed against these criteria. 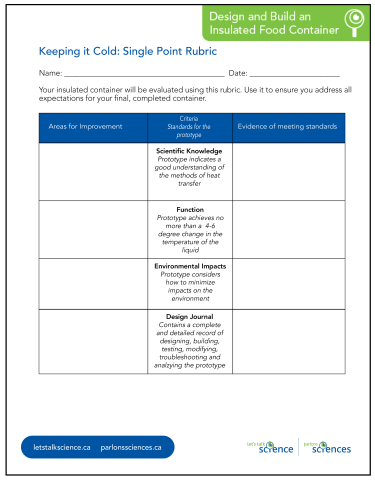
|
LanguageA prototype is an early model of a finished product, usually built for testing purposes. You could add this term to a word wall. IdeaExplain to students that the engineers, electricians, plumbers, carpenters, etc. who build buildings in the real world, have to follow specifications to ensure safety of the people living or working in the building as well as features the person paying for the building wants included. Checklists, such as the ones students are using, are often used to make sure nothing is missed when designing, building and testing real-world objects. IdeaAdjust the rubric to suit the needs of your students and any specific curricular outcomes you wish to assess. |
|
Designing the Prototypes Show students the materials that will be available to them. Note: You will want to edit the reproducible to match what you will be providing students. Clarify with them that before they can access the materials, they must have sketched and labelled the container they plan to build (i.e., they can not start construction until they have an approved plan). Once their plans are approved, they can build their containers. |
TechnologyStudents could use a digital program such as Google Draw or Jamboard to design their prototypes. IdeaStudents could use the Keeping it Cold: Environmental Cost List [Google Doc] [Word doc] [PDF] for the building materials they will use. This list places value on the environmental cost of different materials. Explain that students can use materials like styrofoam but that it will cost a certain amount of environment points. Students should include a tally of the environment points that their design will cost on their sketched plan. ( Less environment points = more environmentally friendly design). |
|
Building the Prototypes Have a spare can of pop or another sparkling beverage available for students to use to check that their containers are large enough. Provide students with a label to affix a number to their prototype. This number will correspond to their row of data on the Prototype Class Data Sheet [Google doc] [Word doc] [PDF]. 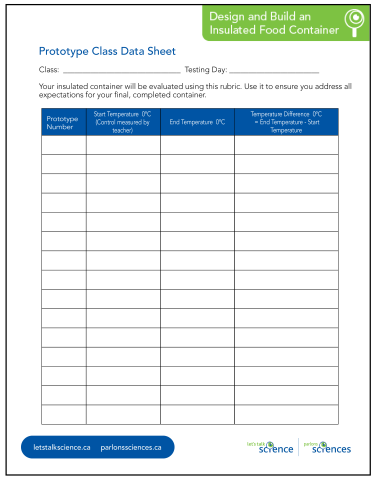
This allows students to remain anonymous while comparing their results against the rest of the class data. As students are working, have conversations with students about the engineering design process. |
SafetyYou may want to have any high-risk tools or materials (e.g., hot glue gun), at a centre that you supervise. DiscussionsDiscussion prompts can include:
IdeaUsing the board or a digital projection device, you could model how to label a design sketch. Including how to incorporate measurements. |
|
Testing the Prototypes On testing day, take all of the cans of pop out of the fridge. Open the control can of pop. Using the sterilized thermometer, take a temperature reading. This will be the baseline measurement for testing. Have students write this down as the start temperature in their Design Planning Journal on the Prototype testing page. Have students place their cans of pop inside their prototypes and tightly seal up the containers. |
|
|
While they are waiting for the test to be over, have students answer the questions about fair testing on the Prototype testing page of the Design Planning Journal. If necessary, teach or review the concept of variables. |
Nature of ScienceIn a fair test, only one thing (the independent variable) is changed at a time. Everything else (the controlled variables) are kept the same. That way, only the independent variable leads to the results (dependent variable). In the class prototype testing, the independent variable is the type of container, the controlled variables are the cans of pop and the time in the containers, and the dependent variable is the temperature change. |
|
After approximately 3 hours have passed, test each prototype starting with group number 1. Ask the first student group to open their insulated container and take out the can of pop. Insert the sterilized thermometer into the liquid and wait for the thermometer to register a reading. Have the group record the temperature in their Design Planning Journal as well as the class data sheet. Repeat for the remaining prototypes. |
IdeaIf you have more than one thermometer, you can test the prototypes in small batches. |
Consolidation: Analyzing the Results (20 minutes)
| Instructions | Teaching Tips |
|---|---|
|
Review class data of end temperatures, and highlight 2-3 prototypes with the least temperature difference. Look at the prototypes with students and have them identify what design features they think worked well to prevent heat transfer in the top performing prototypes. You can also ask students to think about which designs scored well from an environmental perspective. To help students consolidate their learning, have them complete the reflection questions on the last page of the Design Planning Journal. |
TechnologyAs you look at the prototypes, you could collect information using a program like Google Jamboard. |
Background Information for Teachers
Designing and Building in the Real World
When devices such as food containers are designed, much of the work involves planning, designing and making sure the product will meet specific requirements. This work is often carried out by engineers.
Engineers are people who use their scientific knowledge of the properties of materials to solve real world problems such as building food transport containers. Engineers use the knowledge created by scientists to build technology to solve real world problems.

Image - Text Version
Shown is a colour photograph of two people talking and looking at a laptop.
Both people are sitting at a table, looking at the screen of a silver coloured laptop.
The person on the left is talking and gesturing towards the computer with their hands. They have thick, dark, curly hair and light brown skin.
The person on the right has their arms crossed, and is leaning over to get a closer look at the computer. They have short, light brown hair and a beard, and pale skin.
In the background is a grey cement wall and dark hallway.
In addition to engineers, graphic designers may help create the schematic drawings from which objects are constructed. If electrical components are included, electrical engineers might also be included. No matter what the object, it will need testing to make sure the object does what it is designed to do and is safe to use.
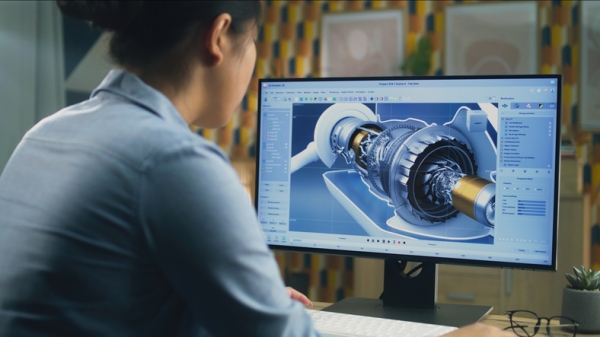
Image - Text Version
Shown is a colour photograph of a person looking at an illustration of a machine on a computer screen.
The person has their back to the camera. They are wearing a pale blue shirt and they have black hair tied in a bun. Their hands are on the mouse and keyboard in front of the computer.
We can see the computer screen over the person's shoulder. Most of the screen is filled with an image of a metallic structure. It is long and spherical, with what looks like rotating wheels and gears.
Additional Resources
Reproducibles
- Preventing Heat Transfer slideshow [Google slides] [pptx] [PDF]
- Keeping it Cold: Design Planning Journal reproducible [Google doc] [Word doc] [PDF]
- Keeping it Cold: Single Point Rubric reproducible [Google doc] [Word doc] [PDF]
- Prototype Class Data Sheet [Google doc] [Word doc] [PDF]
- Optional: Keeping it Cold: Environmental Cost List [Google Doc] [Word doc] [PDF]
Videos
Reproducibles and Media
Reproducibles
- Preventing Heat Transfer slideshow [Google slides] [pptx] [PDF]
- Keeping it Cold: Design Planning Journal reproducible [Google doc] [Word doc] [PDF]
- Keeping it Cold: Single Point Rubric reproducible [Google doc] [Word doc] [PDF]
- Prototype Class Data Sheet [Google doc] [Word doc] [PDF]
- Optional: Keeping it Cold: Environmental Cost List [Google Doc] [Word doc] [PDF]
Videos
Science
- Students could try to improve their designs and repeat the testing.
- Students could investigate the amount of landfill, due to polystyrene take-out containers, created by their school community.
- Students could explore the issues surrounding why polystyrene is not recycled in most places and what can be done about it.
Language Arts
- Students could create posters or pamphlets explaining the issues related to using polystyrene take-out food containers.
- Students could write letters to provincial and municipal governments outlining the issues related to using polystyrene containers and the need to use alternative food containers.
Visual Arts
- Students could create a poster, collage, or other visual representation of the impacts of polystyrene food containers on the environment.
Extensions
Science
- Students could try to improve their designs and repeat the testing.
- Students could investigate the amount of landfill, due to polystyrene take-out containers, created by their school community.
- Students could explore the issues surrounding why polystyrene is not recycled in most places and what can be done about it.
Language Arts
- Students could create posters or pamphlets explaining the issues related to using polystyrene take-out food containers.
- Students could write letters to provincial and municipal governments outlining the issues related to using polystyrene containers and the need to use alternative food containers.
Visual Arts
- Students could create a poster, collage, or other visual representation of the impacts of polystyrene food containers on the environment.
Polystyrene: The Pros, the Cons, the Chemistry (2019)
This article by Let’s Talk Science looks at the chemistry and environmental impacts of polystyrene.
The Environmental Impact of Styrofoam Cups
This article from the Sustainable Business Toolkit explains the environmental impact of styrofoam takeaway containers and offers alternatives.
Science of the self-heating hot pot: an exothermic CaO + H2O chemical reaction! (2020)
This video (8:31 mins.) explains the chemical reaction of self-heating food by showing it on a bowl of noodles.
Learn More
Polystyrene: The Pros, the Cons, the Chemistry (2019)
This article by Let’s Talk Science looks at the chemistry and environmental impacts of polystyrene.
The Environmental Impact of Styrofoam Cups
This article from the Sustainable Business Toolkit explains the environmental impact of styrofoam takeaway containers and offers alternatives.
Science of the self-heating hot pot: an exothermic CaO + H2O chemical reaction! (2020)
This video (8:31 mins.) explains the chemical reaction of self-heating food by showing it on a bowl of noodles.
- Helmenstine, A. M. (Nov. 24, 2019). 10 Examples of Electrical Conductors and Insulators. ThoughtCo.
References
- Helmenstine, A. M. (Nov. 24, 2019). 10 Examples of Electrical Conductors and Insulators. ThoughtCo.
Reproducibles
- Preventing Heat Transfer slideshow [Google slides] [pptx] [PDF]
- Keeping it Cold: Design Planning Journal reproducible [Google doc] [Word doc] [PDF]
- Keeping it Cold: Single Point Rubric reproducible [Google doc] [Word doc] [PDF]
- Prototype Class Data Sheet [Google doc] [Word doc] [PDF]
- Optional: Keeping it Cold: Environmental Cost List [Google Doc] [Word doc] [PDF]
Videos
Reproducibles and Media
Reproducibles
- Preventing Heat Transfer slideshow [Google slides] [pptx] [PDF]
- Keeping it Cold: Design Planning Journal reproducible [Google doc] [Word doc] [PDF]
- Keeping it Cold: Single Point Rubric reproducible [Google doc] [Word doc] [PDF]
- Prototype Class Data Sheet [Google doc] [Word doc] [PDF]
- Optional: Keeping it Cold: Environmental Cost List [Google Doc] [Word doc] [PDF]
Videos
Science
- Students could try to improve their designs and repeat the testing.
- Students could investigate the amount of landfill, due to polystyrene take-out containers, created by their school community.
- Students could explore the issues surrounding why polystyrene is not recycled in most places and what can be done about it.
Language Arts
- Students could create posters or pamphlets explaining the issues related to using polystyrene take-out food containers.
- Students could write letters to provincial and municipal governments outlining the issues related to using polystyrene containers and the need to use alternative food containers.
Visual Arts
- Students could create a poster, collage, or other visual representation of the impacts of polystyrene food containers on the environment.
Extensions
Science
- Students could try to improve their designs and repeat the testing.
- Students could investigate the amount of landfill, due to polystyrene take-out containers, created by their school community.
- Students could explore the issues surrounding why polystyrene is not recycled in most places and what can be done about it.
Language Arts
- Students could create posters or pamphlets explaining the issues related to using polystyrene take-out food containers.
- Students could write letters to provincial and municipal governments outlining the issues related to using polystyrene containers and the need to use alternative food containers.
Visual Arts
- Students could create a poster, collage, or other visual representation of the impacts of polystyrene food containers on the environment.
Polystyrene: The Pros, the Cons, the Chemistry (2019)
This article by Let’s Talk Science looks at the chemistry and environmental impacts of polystyrene.
The Environmental Impact of Styrofoam Cups
This article from the Sustainable Business Toolkit explains the environmental impact of styrofoam takeaway containers and offers alternatives.
Science of the self-heating hot pot: an exothermic CaO + H2O chemical reaction! (2020)
This video (8:31 mins.) explains the chemical reaction of self-heating food by showing it on a bowl of noodles.
Learn More
Polystyrene: The Pros, the Cons, the Chemistry (2019)
This article by Let’s Talk Science looks at the chemistry and environmental impacts of polystyrene.
The Environmental Impact of Styrofoam Cups
This article from the Sustainable Business Toolkit explains the environmental impact of styrofoam takeaway containers and offers alternatives.
Science of the self-heating hot pot: an exothermic CaO + H2O chemical reaction! (2020)
This video (8:31 mins.) explains the chemical reaction of self-heating food by showing it on a bowl of noodles.
- Helmenstine, A. M. (Nov. 24, 2019). 10 Examples of Electrical Conductors and Insulators. ThoughtCo.
References
- Helmenstine, A. M. (Nov. 24, 2019). 10 Examples of Electrical Conductors and Insulators. ThoughtCo.