Design & Build a Musical Instrument
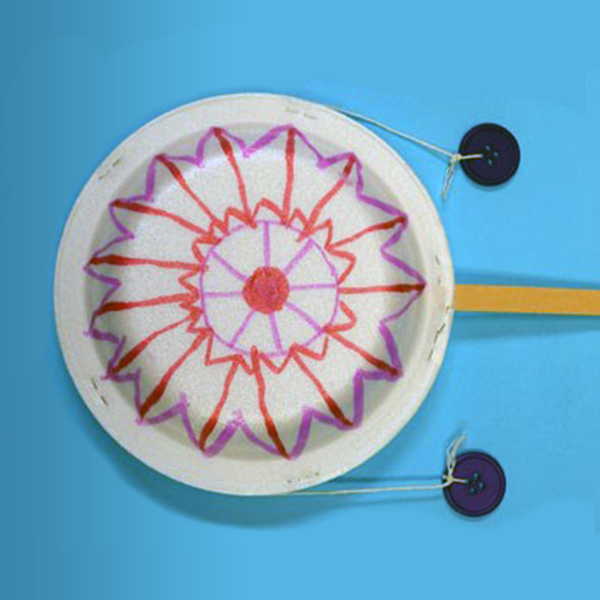
Rattle drum (©2018 Let’s Talk Science)
Rattle drum (©2018 Let’s Talk Science)
How does this align with my curriculum?
Students will learn about the properties of sound as they design, test and build a musical instrument.
Overview
| Activities | Timing | Student Grouping | Description |
|---|---|---|---|
| Minds-On: Research and Understand the Problem | 20 - 30 minutes | Large group | Students learn about the different types of musical instruments |
| Action: Design, Build and Test a Prototype | 40 - 60 minutes | Small group | Students design, build and test a musical instrument |
| Consolidation: Communicate the Solution | 20 - 30 minutes | Individual | Students show and share their musical instrument with the class and complete a reflection |
This lesson can be done over a few days.
Materials and Preparation
Teaching and Learning Activities
Minds-On: Research and Understand the Problem (20-25 min.)
| Instructions | Teaching Tips |
|---|---|
|
Activity Option 1: Gallery Walk Display 5-10 unique instruments (tambourines, maracas, xylophones, etc.) around the classroom. Number each instrument. Print off a copy for each student of the Gallery Walk Musical Instrument Questions reproducible [Google doc] [Word doc] [PDF]. Note: the reproducible has questions for up to 10 instruments; print accordingly. This could be collected and used for assessment. 
Place students into small groups corresponding to the number of instruments you have on display. Assign each group to an instrument station. At their station, have them observe and handle the instrument and then answer the questions that correspond to that instrument’s number. To observe the other instruments, students will do a gallery walk. When each group has completed their questions, have them move to the next station in numerical order (i.e., station 3 moves to station 4; station 10 moves to station1). Continue until each group has completed all stations. |

Community ConnectionsFor many different communities around the world and in Canada, instruments can have a ceremonial or sacred significance. Use of these instruments may need specific teachings, be used by specific people and are not intended for certain audiences. Remember to recognize the significance and honour the values of such items. It is important to ensure that appropriating or romanticizing an object is an act of oppression and discrimination. Through teacher learning and awareness paired with consultation of the caregivers some instruments may need to be omitted from the activity. 
IdeaCollaborate with music teacher in order to obtain musical instruments and facilitate the gallery walk.
IdeaStudents could also do the gallery walk with a partner. |
|
Activity Option 2: Video If you are unable to get instruments in your classroom, print 1 copy for each student of the Activity Option 2: Video Musical Instrument Questions reproducible [Google doc] [Word doc] [PDF]. 
Play the video Learning Music - Wind, String, Percussion Instruments for Kids from Smile and Learn (8:50 min.) and have students individually answer the corresponding questions from the reproducible. After the gallery walk or video activity, ask students to read out some of their answers from the reproducible. Prompt them to explain their choice of answers. |

Images and VideosTurn on the closed captioning so that students can see the text while listening to the dialogue.
IdeaPause the video after each instrument to allow students to answer the questions. 
DiscussionsDiscussion prompts can include:
|
|
Facilitate a free exploration using the materials and objects students have brought to class or those that you have provided. Have students create sounds using different objects. Circulate around the classroom during free exploration to encourage inquiry. During free exploration, have conversations with students about the instruments they will be building. |
IdeaRelate the sounds students make in the free exploration to the sounds of the instruments from the gallery walk and the videos you have shown them. For example if you have a bucket, have students hit it and ask what instrument it sounds like. Ask them which materials could work well together and have them justify why.
IdeaSupport students' decision-making processes by asking them questions regarding their design process.
|
Action: Design, Build and Test a Prototype (40 - 60 min.)
| Instructions | Teaching Tips |
|---|---|
|
As a class, have students co-construct success criteria that their prototype instrument must meet. This criteria will be the basis of their show and share. There are four properties of sound. In order to support students with generating the success criteria review this Properties of Sound interactive presentation [html] [pptx] [PDF]. Note: Consider the following criteria to make the activity more successful:
|
DiscussionsDuring brainstorming, ask students questions about how they can successfully reach this outcome. Some potential questions could be:
IdeaStudents could view the interactive presentation as a class, individually or in small groups. |
|
Have students complete the Build a Musical Instrument Design Sketch Plan reproducible [Google doc] [Word doc] [PDF]. 
This could also be done using Google draw or a jamboard if students are working virtually. |
IdeaOn a whiteboard or chalkboard demonstrate how to label a design image. Show students how to label materials they used and the different parts of the design. Ensure students understand how to include measurements on their design plan.
IdeaIf students need a more scaffolded experience, they could watch the How to make Musical Instruments for Kids or 4 MUSICAL INSTRUMENTS Crafts you can do anytime | Fast-n-Easy | DIY Labs that illustrates several methods to build musical instruments upon which they could model their own. Alternatively, provide students with some instruments that have some assembly done and students put together only a few pieces. |
|
Have students build their instrument based on the Design Sketch Plan. As they build the instrument, have them use the reminders from the Design Sketch Plan to test the sound quality of the instrument as they work, and revise if required. Encourage students to document their own troubleshooting on the third page of the reproducible. 
|
|
Consolidation: Communicate the Solution (30 - 40 min.)
| Instructions | Teaching Tips |
|---|---|
|
Have students complete the My Musical Instrument: I Can Statements reproducible [Google doc] [Word doc] [PDF]. 
Students will use their completed I Can Statements as a guide for the show and share. Give students about five minutes each to present their instruments to their classmates. Students may do a video, poster, slideshow, etc. |
IdeaStudents could create multimedia projects such as short videos, slideshows or posters to present their musical instruments. |
|
Have students fill out the My Musical Instrument: Reflection reproducible independently or in a group depending on how they chose to work on their projects [Google doc] [Word doc] [PDF]. 
|
Background Information for Teachers
Humans hear sound when our ears and brain process sound waves produced by an object. The object produces sound waves by vibrating.
Wavelength is a measure of the distance between waves. This distance determines a sound’s frequency. The shorter the wavelength, the higher the frequency of the sound. Frequency determines the pitch of a sound. High-pitched sounds have a high frequency. Low-pitched sounds have a low frequency.
Amplitude is a measure of the height of waves. This height determines a sound’s amplitude. The greater the amplitude, the louder the sound.

Image - Text Version
Shown is a colour photograph of wooden musical instruments.
Several of the instruments are cylindrical in shape and pale brown in colour. Pale-coloured materials are stretched across the open ends of the cylinders. These are connected to the cylinders using string. Other instruments are formed from narrow strips of wood that are lined up side by side from shortest to longest and connected together with strings.
Additional Resources
Reproducibles
- Gallery Walk Musical Instrument Questions [Google doc] [Word doc] [PDF]
- Video Musical Instrument Questions [Google doc] [Word doc] [PDF]
- Build a Musical Instrument Design Sketch Plan [Google doc] [Word doc] [PDF]
- My Musical Instrument: I Can Statements [Google doc] [Word doc] [PDF]
- My Musical Instrument: Reflection [Google doc] [Word doc] [PDF]
Media
Books
Sounds All Around: The Science of How Sounds Works
By Susan Hughes
A comprehensive exploration of sound for young children that's friendly, fun and easy to digest.
ISBN: 1525302507
Drum City
By Thea Guidone
One child's beat on a kettle becomes contagious, spreading throughout the neighbourhood.
ISBN: 9780553523508
Drum city (2010 edition) | Open Library

Videos
How do musical instruments make music? (2014)
This video (2:24 min.), from We The Curious demonstrates how musical instruments make sound.
How to make Musical Instruments for Kids | D.I.Y 5 Musical Instruments for Kids (no date)
This video (10:33 min.), from Craft Mania shows some creative ways to make musical instruments with craft supplies.
4 MUSICAL INSTRUMENTS Crafts you can do anytime | Fast-n-Easy (2018)
This video (8:42 min.), from DIY labs has some great inspiration for making musical instruments out of common household supplies.
Reproducibles and Media
Reproducibles
- Gallery Walk Musical Instrument Questions [Google doc] [Word doc] [PDF]
- Video Musical Instrument Questions [Google doc] [Word doc] [PDF]
- Build a Musical Instrument Design Sketch Plan [Google doc] [Word doc] [PDF]
- My Musical Instrument: I Can Statements [Google doc] [Word doc] [PDF]
- My Musical Instrument: Reflection [Google doc] [Word doc] [PDF]
Media
Books
Sounds All Around: The Science of How Sounds Works
By Susan Hughes
A comprehensive exploration of sound for young children that's friendly, fun and easy to digest.
ISBN: 1525302507
Drum City
By Thea Guidone
One child's beat on a kettle becomes contagious, spreading throughout the neighbourhood.
ISBN: 9780553523508
Drum city (2010 edition) | Open Library
Videos
How do musical instruments make music? (2014)
This video (2:24 min.), from We The Curious demonstrates how musical instruments make sound.
How to make Musical Instruments for Kids | D.I.Y 5 Musical Instruments for Kids (no date)
This video (10:33 min.), from Craft Mania shows some creative ways to make musical instruments with craft supplies.
4 MUSICAL INSTRUMENTS Crafts you can do anytime | Fast-n-Easy (2018)
This video (8:42 min.), from DIY labs has some great inspiration for making musical instruments out of common household supplies.
Literacy
- Students could write a poem about their instrument and the sounds it makes.
- Students could add words to a word wall about sounds and names of musical instruments.
- Students could write a sales pitch to sell the instrument as an entrepreneur would.
Mathematical Thinking
- Students could measure the perimeter of their instrument.
- If a student is designing a shaker or a similar type instrument, they could use fractions to describe how full it is.
Computational Thinking
- Students could make a virtual instrument using a digital program such as Scratch.
Visual Arts
- Students could decorate their instruments to reflect their culture, favourite colours, etc.
- Students could develop the design of the musical instrument using a digital drawing program.
Music
- Students could use their instruments to play a musical scale.
- Students could perform a simple song (e.g., Mary Had a Little Lamb, Twinkle Twinkle Little Star) using their instrument.
- Students create an original musical composition using their instruments.
- Students could perform a classroom concert using all of the instruments they have created.
Career Education
- Students could explore the different jobs done by people who work in the music industry.
- Clarify with students that when they were exploring the sounds instruments or materials made, they were making observations. As they made observations, and as they tried different things to produce sounds in the instrument they built, they were increasing their understanding about how sounds are made. At this time they were behaving like a scientist. When they used their knowledge about sounds to build their musical instrument, they were behaving like an engineer. Engineers use scientific knowledge to create technology that solves our needs or wants. Scientists explore and make observations to create knowledge of how things in the world behave.
Extensions
Literacy
- Students could write a poem about their instrument and the sounds it makes.
- Students could add words to a word wall about sounds and names of musical instruments.
- Students could write a sales pitch to sell the instrument as an entrepreneur would.
Mathematical Thinking
- Students could measure the perimeter of their instrument.
- If a student is designing a shaker or a similar type instrument, they could use fractions to describe how full it is.
Computational Thinking
- Students could make a virtual instrument using a digital program such as Scratch.
Visual Arts
- Students could decorate their instruments to reflect their culture, favourite colours, etc.
- Students could develop the design of the musical instrument using a digital drawing program.
Music
- Students could use their instruments to play a musical scale.
- Students could perform a simple song (e.g., Mary Had a Little Lamb, Twinkle Twinkle Little Star) using their instrument.
- Students create an original musical composition using their instruments.
- Students could perform a classroom concert using all of the instruments they have created.
Career Education
- Students could explore the different jobs done by people who work in the music industry.
- Clarify with students that when they were exploring the sounds instruments or materials made, they were making observations. As they made observations, and as they tried different things to produce sounds in the instrument they built, they were increasing their understanding about how sounds are made. At this time they were behaving like a scientist. When they used their knowledge about sounds to build their musical instrument, they were behaving like an engineer. Engineers use scientific knowledge to create technology that solves our needs or wants. Scientists explore and make observations to create knowledge of how things in the world behave.
What is Sound and How Do We Hear it? (2019)
This backgrounder from Let’s Talk Science provides information regarding the way sound travels in waves and how it is measured.
Sound vs. Noise (2019)
This article from Let’s Talk Science explains the difference between sound and noise.
Learn More
What is Sound and How Do We Hear it? (2019)
This backgrounder from Let’s Talk Science provides information regarding the way sound travels in waves and how it is measured.
Sound vs. Noise (2019)
This article from Let’s Talk Science explains the difference between sound and noise.
- Let’s Talk Science (September 21, 2019). What is Sound and How do we Hear it?.
References
- Let’s Talk Science (September 21, 2019). What is Sound and How do we Hear it?.
Reproducibles
- Gallery Walk Musical Instrument Questions [Google doc] [Word doc] [PDF]
- Video Musical Instrument Questions [Google doc] [Word doc] [PDF]
- Build a Musical Instrument Design Sketch Plan [Google doc] [Word doc] [PDF]
- My Musical Instrument: I Can Statements [Google doc] [Word doc] [PDF]
- My Musical Instrument: Reflection [Google doc] [Word doc] [PDF]
Media
Books
Sounds All Around: The Science of How Sounds Works
By Susan Hughes
A comprehensive exploration of sound for young children that's friendly, fun and easy to digest.
ISBN: 1525302507
Drum City
By Thea Guidone
One child's beat on a kettle becomes contagious, spreading throughout the neighbourhood.
ISBN: 9780553523508
Drum city (2010 edition) | Open Library
Videos
How do musical instruments make music? (2014)
This video (2:24 min.), from We The Curious demonstrates how musical instruments make sound.
How to make Musical Instruments for Kids | D.I.Y 5 Musical Instruments for Kids (no date)
This video (10:33 min.), from Craft Mania shows some creative ways to make musical instruments with craft supplies.
4 MUSICAL INSTRUMENTS Crafts you can do anytime | Fast-n-Easy (2018)
This video (8:42 min.), from DIY labs has some great inspiration for making musical instruments out of common household supplies.
Reproducibles and Media
Reproducibles
- Gallery Walk Musical Instrument Questions [Google doc] [Word doc] [PDF]
- Video Musical Instrument Questions [Google doc] [Word doc] [PDF]
- Build a Musical Instrument Design Sketch Plan [Google doc] [Word doc] [PDF]
- My Musical Instrument: I Can Statements [Google doc] [Word doc] [PDF]
- My Musical Instrument: Reflection [Google doc] [Word doc] [PDF]
Media
Books
Sounds All Around: The Science of How Sounds Works
By Susan Hughes
A comprehensive exploration of sound for young children that's friendly, fun and easy to digest.
ISBN: 1525302507
Drum City
By Thea Guidone
One child's beat on a kettle becomes contagious, spreading throughout the neighbourhood.
ISBN: 9780553523508
Drum city (2010 edition) | Open Library
Videos
How do musical instruments make music? (2014)
This video (2:24 min.), from We The Curious demonstrates how musical instruments make sound.
How to make Musical Instruments for Kids | D.I.Y 5 Musical Instruments for Kids (no date)
This video (10:33 min.), from Craft Mania shows some creative ways to make musical instruments with craft supplies.
4 MUSICAL INSTRUMENTS Crafts you can do anytime | Fast-n-Easy (2018)
This video (8:42 min.), from DIY labs has some great inspiration for making musical instruments out of common household supplies.
Literacy
- Students could write a poem about their instrument and the sounds it makes.
- Students could add words to a word wall about sounds and names of musical instruments.
- Students could write a sales pitch to sell the instrument as an entrepreneur would.
Mathematical Thinking
- Students could measure the perimeter of their instrument.
- If a student is designing a shaker or a similar type instrument, they could use fractions to describe how full it is.
Computational Thinking
- Students could make a virtual instrument using a digital program such as Scratch.
Visual Arts
- Students could decorate their instruments to reflect their culture, favourite colours, etc.
- Students could develop the design of the musical instrument using a digital drawing program.
Music
- Students could use their instruments to play a musical scale.
- Students could perform a simple song (e.g., Mary Had a Little Lamb, Twinkle Twinkle Little Star) using their instrument.
- Students create an original musical composition using their instruments.
- Students could perform a classroom concert using all of the instruments they have created.
Career Education
- Students could explore the different jobs done by people who work in the music industry.
- Clarify with students that when they were exploring the sounds instruments or materials made, they were making observations. As they made observations, and as they tried different things to produce sounds in the instrument they built, they were increasing their understanding about how sounds are made. At this time they were behaving like a scientist. When they used their knowledge about sounds to build their musical instrument, they were behaving like an engineer. Engineers use scientific knowledge to create technology that solves our needs or wants. Scientists explore and make observations to create knowledge of how things in the world behave.
Extensions
Literacy
- Students could write a poem about their instrument and the sounds it makes.
- Students could add words to a word wall about sounds and names of musical instruments.
- Students could write a sales pitch to sell the instrument as an entrepreneur would.
Mathematical Thinking
- Students could measure the perimeter of their instrument.
- If a student is designing a shaker or a similar type instrument, they could use fractions to describe how full it is.
Computational Thinking
- Students could make a virtual instrument using a digital program such as Scratch.
Visual Arts
- Students could decorate their instruments to reflect their culture, favourite colours, etc.
- Students could develop the design of the musical instrument using a digital drawing program.
Music
- Students could use their instruments to play a musical scale.
- Students could perform a simple song (e.g., Mary Had a Little Lamb, Twinkle Twinkle Little Star) using their instrument.
- Students create an original musical composition using their instruments.
- Students could perform a classroom concert using all of the instruments they have created.
Career Education
- Students could explore the different jobs done by people who work in the music industry.
- Clarify with students that when they were exploring the sounds instruments or materials made, they were making observations. As they made observations, and as they tried different things to produce sounds in the instrument they built, they were increasing their understanding about how sounds are made. At this time they were behaving like a scientist. When they used their knowledge about sounds to build their musical instrument, they were behaving like an engineer. Engineers use scientific knowledge to create technology that solves our needs or wants. Scientists explore and make observations to create knowledge of how things in the world behave.
What is Sound and How Do We Hear it? (2019)
This backgrounder from Let’s Talk Science provides information regarding the way sound travels in waves and how it is measured.
Sound vs. Noise (2019)
This article from Let’s Talk Science explains the difference between sound and noise.
Learn More
What is Sound and How Do We Hear it? (2019)
This backgrounder from Let’s Talk Science provides information regarding the way sound travels in waves and how it is measured.
Sound vs. Noise (2019)
This article from Let’s Talk Science explains the difference between sound and noise.
- Let’s Talk Science (September 21, 2019). What is Sound and How do we Hear it?.
References
- Let’s Talk Science (September 21, 2019). What is Sound and How do we Hear it?.