Design & Build a Ping Pong Ball Launcher
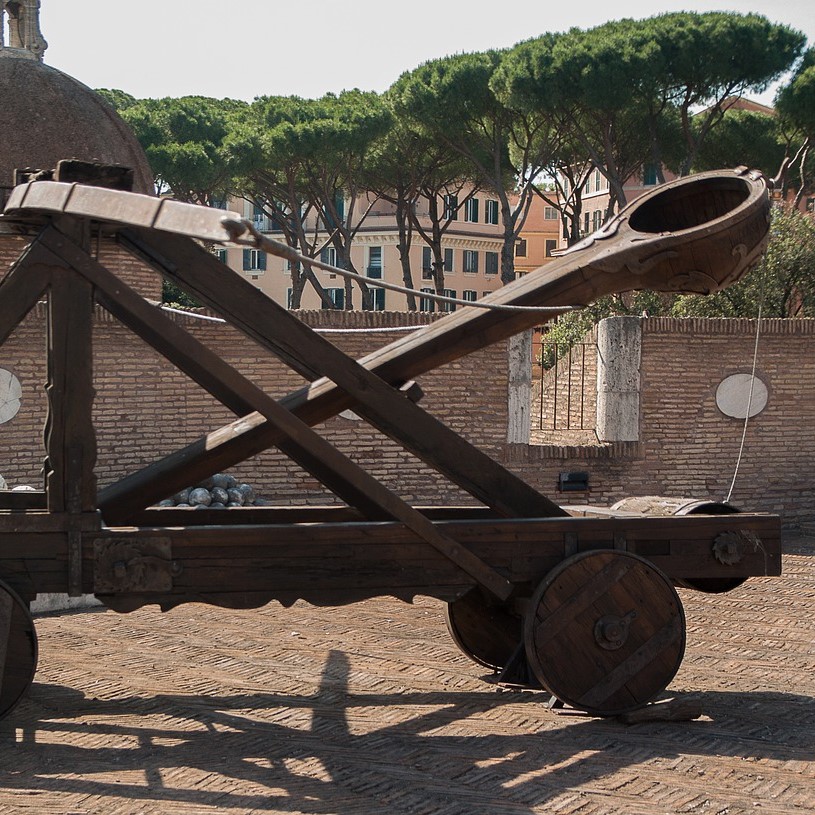
Catapult near Castle Saint-Angel, Italy (jacqueline macou, Pixabay)
Catapult near Castle Saint-Angel, Italy (jacqueline macou, Pixabay)
How does this align with my curriculum?
Students work collaboratively to design and build a device that uses simple machines to launch ping-pong balls.
Overview
Students will create and test a device which uses simple machines to launch a ping-pong ball as far as possible or up and over an obstacle.
Timing
45-60 minutes
Setting the Stage
Prior Skills and Knowledge
To successfully participate in this Design & Build lesson, students should be able to use basic cutting tools and fasteners for construction. It is highly recommended that students have prior knowledge and skills related to the use of simple machines before participating in this Design & Build challenge.
Context
Throughout history, humans have sought to find ways to get objects over obstacles. This frequently involved using some sort of device to propel the object up into the air and over the obstacle. In ancient times, people developed devices called catapults to solve this problem. Catapults include the mangonel (fulcrum pivots at one end and the force is applied by applying tension to the fulcrum) and the trebuchet (fulcrum pivots at its centre and the force is applied by a counterweight located at the end of the fulcrum). In these types of devices, force is transferred through a mechanical system to propel an object such as a rock (or pumpkin) up, up and away!
This Design & Build challenge provides opportunities for students to predict how a given force affects the distance travelled by an object, as well as compare how forces of different magnitudes result in different distances travelled by propelled objected. Students will work collaboratively and develop their Design & Build skills to safely create and test a device which uses simple machines to launch a ping-pong ball either a) as far as possible or b) up and over an obstacle such as a badminton net or a volleyball net.
This design and build could begin from:
- questions and/or comments that arise after students view pictures of devices such as catapults and trebuchets used in early societies. Discuss using questions such as:
- “What do you think was the purpose of devices like these? How would their builders know if it was successful?”
- “How do you think this device works? What simple machines does it use to help it achieve its purpose?”
- “How did the builders control where the object lands? How accurate do you think they were able to be? Why do you think this?”

- questions and/or comments that arise after students view videos of present-day catapults or trebuchets (e.g., videos of a “pumpkin catapult ” on YouTube).
- “What kind of force is causing the pumpkin to move?”
- “What do you think would happen to the pumpkin if a greater force was applied to the object?”
- “How could you measure the amount of force that is used?”
- going on a field trip to attend an event (e.g., a renaissance fair or local pumpkin-throwing contest) where demonstrations of catapults take place.

Design Criteria
As a class, students brainstorm criteria that their prototype ping-pong ball launchers must meet. Educators may choose to add other criteria that are curriculum-specific, such as using specific types or numbers of joiners/fasteners, measuring, using specific materials, etc.
Design criteria examples:
- Must be able to go up and over a badminton net OR must go as far as possible from the starting position
- Must incorporate a minimum of 2 different types of simple machines
- Must use 3 joiners/fasteners
- Must include a way to change where the ball lands (adjust height of launcher)
- Use minimum of $5 and maximum of $10 when purchasing materials
Details
- cardboard boxes and tubes, various sizes
- craft sticks
- cups, assorted, small (e.g., paper, Styrofoam)
- elastic bands, various sizes
- fastening materials (tape, glue, etc.)
- paper (construction, cardstock, etc.)
- paper clips
- ping-pong balls (one per group)
- pipe cleaners
- scissors (1/student group)
- straws, drinking
- string
- tape, masking
- safety glasses
- Collect an assortment of recycled and new materials that students will use to construct the prototypes. The materials list above is only a suggested list.
- Determine the required quantities of materials for each working group and organize the materials.
- Option: Provide students with a set amount of play money and set up a ‘store’ area where students can ‘buy’ their materials. This could be included in the design criteria (e.g., you must spend a minimum of $5 and a maximum of $10.).
- Choose a large open area (such as the gym, or outdoors) for testing. Have students wear safety glasses.
Students develop and apply Design & Build skills as they design, build and test a prototype ping-pong launcher.
Students will follow the steps of the Design & Build process:
- identify the problem to be solved/need to be met
- brainstorm criteria that the prototype must meet
- share their questions and ideas for a solution to the problem/need
- discuss the advantages and disadvantages of each in order to select a potential solution to be tested
- visualize what the solution might look like and make design sketches based on their visualizations
- develop a design plan (e.g., identify the tasks or key steps involved in developing the solution, make decisions about tools and materials that will be needed, include labelled sketches)
- build/develop the design idea based on the design plan
- test their prototypes based on the design criteria
- modify the prototype and retest it against the design criteria as necessary
- reflect on their results and identify things that could be done to improve their prototypes

Observe and document, using anecdotal comments, photos and/or video recordings, student’s ability to:
- Work Collaboratively – students work collaboratively to complete a task and evaluate their group processes throughout the Design & Build process
- Generate Ideas – students use idea generation skills and strategies, such as brainstorming, to identify possible solutions as well as make decisions about the pros and cons of each solution
- Communicate – students communicate their thinking and learning in words, sketches, photos, videos, etc. (e.g., in identifying the problem, in design plans that include 2D design sketches and key design steps/tasks, in lists of materials/equipment/tools)
- Work Safely – students demonstrate safe practices when using a variety of tools and materials while prototyping
- Test – students use skills of observing and recording data as they test their prototypes
- Reflect – students reflect on the results of their prototype testing and suggest things that they might do differently to improve their prototypes
| Students: Saying, Doing, Representing |
Educator: Interactions: Responding, Challenging |
|---|---|
| Students identify and refine the problem to be solved/need to be met. |
|
| Students brainstorm and record criteria for the ping-pong ball launcher. |
|
| Students visualize what the solution might look like and make design sketches based on their visualizations. |
|
| Students make observations and decisions about the available tools and materials. |
|
| Students build/develop and test the design idea based on their sketches and design plan (create the “prototype”). |
|
| Students modify the prototype and retest it against the design criteria as necessary. |
|
| Students reflect on the results of their testing and identify things that could be done differently in the future. |
|
Literacy
- Ask questions (e.g., “What surprised you about your device?” “What role did devices like these play in the past?” “What sorts of tasks could a device like this help us with?”)
- Communicate thoughts, feelings and ideas (e.g., while brainstorming criteria for a launcher, in design plans that include 2D design sketches, in an outline of key design steps/tasks and lists of required materials and equipment/tools; discuss solutions for construction challenges)
- Access information from various sources of media (e.g., books, videos, in-person experiences)
Mathematical Thinking
- Represent using pictures, diagrams, graphs, tables, numbers, words, and/or symbols (e.g., sketch their visualization of how their launcher might meet the established criteria; use tables to record tests and redesigns of their launchers)
- measure the distance travelled horizontally and/or vertically using both standard and non-standard measures
If your students are interested in learning more, the following may provoke their curiosity:
- Encourage students to use the knowledge and skills developed in this challenge to solve a real-life problem, such as how to create:
- an automatic ping-pong ball launcher
- a launcher that can get the ball to land on a ping-pong table
- a launcher that can have balls land in a bucket consistently
- a launcher that can launch a toy for a dog to fetch
- Discuss with students how they would adapt the launcher to make it launch other objects such as tennis balls, basketballs, pumpkins, etc.
- Provide opportunities for students to present their launchers before a mock “Dragon’s Den” panel (could be teachers, older students and/or community members). The machines could be judged on originality, cost (if using play money), purpose (e.g., to launch a dog toy), accuracy, etc.

- Pumpkin Catapult (2018) National Geographic -- Video (3:09 min.) of a pumpkin catapulting competition, demonstrating a variety of catapult inventions in action.
- Pumpkin Catapult (2010) M64Sport -- Video (3:32 min.) of pumpkin tossing competition by Boy Scouts.
Catapult Facts for Kids (2020) Kiddle Encyclopedia -- Learn all about catapults on this web page for kids.
Simple Machines - Levers (Backgrounders)
The lever is a type of simple machine. Learn about the different classes of levers and how they provide mechanical advantage.
Simple Machines: Levers (Picture Collections)
6 images of some objects such as tweezers, scissors and wheel barrows that use the lever principle to create movement for a specific purpose.
Materials
- cardboard boxes and tubes, various sizes
- craft sticks
- cups, assorted, small (e.g., paper, Styrofoam)
- elastic bands, various sizes
- fastening materials (tape, glue, etc.)
- paper (construction, cardstock, etc.)
- paper clips
- ping-pong balls (one per group)
- pipe cleaners
- scissors (1/student group)
- straws, drinking
- string
- tape, masking
- safety glasses
Preparation
- Collect an assortment of recycled and new materials that students will use to construct the prototypes. The materials list above is only a suggested list.
- Determine the required quantities of materials for each working group and organize the materials.
- Option: Provide students with a set amount of play money and set up a ‘store’ area where students can ‘buy’ their materials. This could be included in the design criteria (e.g., you must spend a minimum of $5 and a maximum of $10.).
- Choose a large open area (such as the gym, or outdoors) for testing. Have students wear safety glasses.
What to Do
Students develop and apply Design & Build skills as they design, build and test a prototype ping-pong launcher.
Students will follow the steps of the Design & Build process:
- identify the problem to be solved/need to be met
- brainstorm criteria that the prototype must meet
- share their questions and ideas for a solution to the problem/need
- discuss the advantages and disadvantages of each in order to select a potential solution to be tested
- visualize what the solution might look like and make design sketches based on their visualizations
- develop a design plan (e.g., identify the tasks or key steps involved in developing the solution, make decisions about tools and materials that will be needed, include labelled sketches)
- build/develop the design idea based on the design plan
- test their prototypes based on the design criteria
- modify the prototype and retest it against the design criteria as necessary
- reflect on their results and identify things that could be done to improve their prototypes
Assessment
Observe and document, using anecdotal comments, photos and/or video recordings, student’s ability to:
- Work Collaboratively – students work collaboratively to complete a task and evaluate their group processes throughout the Design & Build process
- Generate Ideas – students use idea generation skills and strategies, such as brainstorming, to identify possible solutions as well as make decisions about the pros and cons of each solution
- Communicate – students communicate their thinking and learning in words, sketches, photos, videos, etc. (e.g., in identifying the problem, in design plans that include 2D design sketches and key design steps/tasks, in lists of materials/equipment/tools)
- Work Safely – students demonstrate safe practices when using a variety of tools and materials while prototyping
- Test – students use skills of observing and recording data as they test their prototypes
- Reflect – students reflect on the results of their prototype testing and suggest things that they might do differently to improve their prototypes
Co-constructed Learning
| Students: Saying, Doing, Representing |
Educator: Interactions: Responding, Challenging |
|---|---|
| Students identify and refine the problem to be solved/need to be met. |
|
| Students brainstorm and record criteria for the ping-pong ball launcher. |
|
| Students visualize what the solution might look like and make design sketches based on their visualizations. |
|
| Students make observations and decisions about the available tools and materials. |
|
| Students build/develop and test the design idea based on their sketches and design plan (create the “prototype”). |
|
| Students modify the prototype and retest it against the design criteria as necessary. |
|
| Students reflect on the results of their testing and identify things that could be done differently in the future. |
|
Cross-curricular Connections
Literacy
- Ask questions (e.g., “What surprised you about your device?” “What role did devices like these play in the past?” “What sorts of tasks could a device like this help us with?”)
- Communicate thoughts, feelings and ideas (e.g., while brainstorming criteria for a launcher, in design plans that include 2D design sketches, in an outline of key design steps/tasks and lists of required materials and equipment/tools; discuss solutions for construction challenges)
- Access information from various sources of media (e.g., books, videos, in-person experiences)
Mathematical Thinking
- Represent using pictures, diagrams, graphs, tables, numbers, words, and/or symbols (e.g., sketch their visualization of how their launcher might meet the established criteria; use tables to record tests and redesigns of their launchers)
- measure the distance travelled horizontally and/or vertically using both standard and non-standard measures
Extending the Learning
If your students are interested in learning more, the following may provoke their curiosity:
- Encourage students to use the knowledge and skills developed in this challenge to solve a real-life problem, such as how to create:
- an automatic ping-pong ball launcher
- a launcher that can get the ball to land on a ping-pong table
- a launcher that can have balls land in a bucket consistently
- a launcher that can launch a toy for a dog to fetch
- Discuss with students how they would adapt the launcher to make it launch other objects such as tennis balls, basketballs, pumpkins, etc.
- Provide opportunities for students to present their launchers before a mock “Dragon’s Den” panel (could be teachers, older students and/or community members). The machines could be judged on originality, cost (if using play money), purpose (e.g., to launch a dog toy), accuracy, etc.
Supporting Media
- Pumpkin Catapult (2018) National Geographic -- Video (3:09 min.) of a pumpkin catapulting competition, demonstrating a variety of catapult inventions in action.
- Pumpkin Catapult (2010) M64Sport -- Video (3:32 min.) of pumpkin tossing competition by Boy Scouts.
Learn More
Catapult Facts for Kids (2020) Kiddle Encyclopedia -- Learn all about catapults on this web page for kids.
Simple Machines - Levers (Backgrounders)
The lever is a type of simple machine. Learn about the different classes of levers and how they provide mechanical advantage.
Simple Machines: Levers (Picture Collections)
6 images of some objects such as tweezers, scissors and wheel barrows that use the lever principle to create movement for a specific purpose.