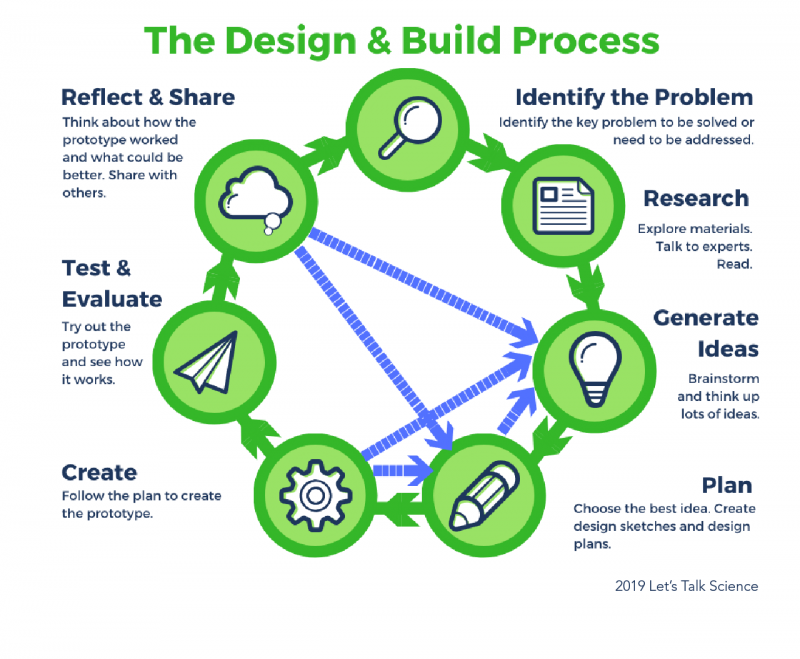
The Design & Build Process

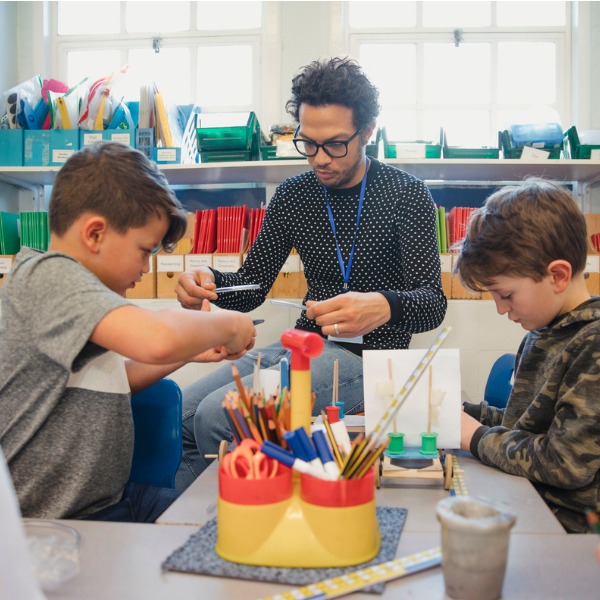
Students designing and building (SolStock, iStockphoto)

Students designing and building (SolStock, iStockphoto)
How does this align with my curriculum?
| Grade | Course | Topic |
|---|
One way that humans apply skills and knowledge as we fulfil our desire to modify the world to suit our needs is through technological problem-solving.
Humans have survived and thrived over the millennia due to our ability to make things. We are constantly looking for ways to create tools, machines, and systems in order to meet our needs and wants. One way to do this is through technological problem-solving.
Did you know?
Technology refers to both the products invented by people as well as the processes and knowledge needed to design and build those products.
The ‘products’ derived from technological problem-solving come in many different forms. These forms can include:
- physical objects (e.g., bridges, towers, chairs)
- devices (e.g., fishing rods, can openers, pencil sharpeners)
- processes (e.g., a way of storing winter boots, coats, hats and mittens in way that keeps hallways tidy and safe).
It is important for students to be aware that just about all products and systems around them have been designed and built by people. By participating in technological problem-solving tasks, students will discover that they themselves can solve problems and create products and systems using their own imaginations.
Engineers and inventors are people who solve technological problems all of the time. They think about problems, consider and test solutions, and reflect on their successes and failures. Students too can think like engineers and inventors by systematically thinking about, planning and testing solutions to problems. This systematic thinking is outlined in the Design & Build process below.

Image - Text Version
The design and build process involves identifying the problem, research, generating ideas, planning, creating, testing evaluating, reflecting and sharing.
The first step in the Design & Build process is the identification of the key problem to be solved or need to be addressed. The problems/needs that students identify may arise from their everyday experiences at home, at school and in the community. The problems may also be inspired by the stories they have heard or read.

Students develop their problem identification skills as they ask questions, share prior knowledge and work collaboratively to clarify and refine the problem to be solved. Students will need to consider whether their problem requires them to construct something (e.g., a raft to carry the characters from a story) or to find a way of doing something (e.g., a fair way to share a limited number of new tablets). Subsequent steps in the Design & Build process may lead to the identification or clarification of additional problems/constraints.
It is important for students to have a clear, common understanding of what it is they are trying to accomplish. To gain this understanding, students should identify:
- design criteria: characteristics of final solution/product
- constraints: limits you have to work within (time, costs, availability of materials, etc...)
(e.g., “The boat needs to hold six objects and float without assistance on water for 10 minutes. You can only use the materials provided.”)
The second step in the Design & Build process is research. This can come in many forms, from talking to people who might be able to help with the solution to exploring tools, materials and processes.
Many technological solutions are really just modifications of existing technology. This means students should be encouraged to find out about similar solutions to the problem that already exist. This can include:
- going on field trips
- reading books
- visiting websites
- watching videos about real-world technological solutions to problems (e.g., how real dams are constructed, how water towers work)
When searching for a solution to a problem in the Design & Build process, many different ideas should be generated and considered. Students will develop skills related to idea generation when they generate ideas on their own, as well as by participating in small and large group activities such as brainstorming.
Idea generation is often a collaborative process because more and novel ideas can be generated when students listen to and build on the ideas of others. Educators may need to model appropriate idea generation and feedback that demonstrates respect for the thoughts and opinions of others. Students may need to be reminded to stay on topic and to only have one person speaking at a time.
At the end of this stage of the Design & Build process, students should discuss the advantages and disadvantages of each design idea. They can do this by comparing and contrasting potential design ideas in order to select a solution to create and test. Students should revisit the criteria and research from previous stages in the Design & Build process before making their final decision.
Educators should also reinforce that while there can be several solutions to a given problem, some solutions may be better suited to the situation than others. Since students often feel strongly about their ideas, remind students that when doing Design & Build activities as a group, good solutions are all about teamwork.
Once solutions for a given Design & Build problem have been narrowed down, students need to visualize what the solution might look like if successful. In order to communicate their visions to others, students can create design plans. Design planning involves identifying the methods, tools, materials and sequence of steps necessary to create and test a solution to a Design & Build problem. Design plans can include labelled design sketches, flowcharts and storyboards.
Before creating design plans, students may need to develop familiarity with different sorts of tools, materials and equipment. They can do this by participating in scientific inquiries. For more about Let’s Talk Science’s approach to inquiry learning, see the Inquiry Approach to Learning Backgrounder.
As students form their design plans, they may realize that their initial idea is not feasible. If this happens, encourage them to revisit other ideas they had during the Idea Generation phase.
Once a promising solution is chosen, and a plan is made, ideas can be made into reality. This reality takes the form of prototypes.
A prototype is a working model that is used to test a design solution. In real life, prototypes help to determine the effectiveness of design solutions before the final product or system is produced. With students, the prototype may be the final solution itself (a functional prototype). Prototyping involves the use of many different skills depending on the type of product or system that is created (physical product, system, computer code, etc.).
While creating prototypes, students should be encouraged to work safely. This includes:
- having a clear understanding of what safe practices in their classroom look like and sound like
- following established safety procedures when working with materials, tools, and equipment
- showing care and concern for their safety and that of others.
As students work on creating their solutions, they may realize that their creation cannot be tested. If this happens, encourage them to revisit other ideas they had during the Idea Generation phase and develop a new plan.
Once ready, students test their prototypes with the test set-up they identified during the Planning phase.
Encourage students to refer back to the design criteria/requirements/constraints when they test their designs. Work with students to ensure that test areas are set up so that the testing can be done safely and in a fair manner (e.g., set up a container where water of a sufficient depth can be available for testing boats).
Also during testing, students are encouraged to make observations and record data about how the prototype functioned, keeping in mind the design criteria. This may be in the form of videos, written journals, charts, etc. Recording what happens is important, especially if the first attempt at a design solution is not successful.
This final phase of the Design & Build process involves analyzing the results from prototype testing and determining how well the design met the established criteria. If the criteria are met, then the solution is successful. If the criteria are not met, then the initial solution is a failure.
Failure can be a difficult experience. Thus, educators are encouraged to support students when their designs fail to meet criteria. Remind students that many designs fail the first time around, but that there is still much to be learned when a design does not work as anticipated.
When a design does not meet the criteria, then as part of the reflection process students are encouraged to think about what about the solution did not work as well as why it did not work. This can involve thinking about the materials and fasteners that were used, the accuracy of measurements, the testing set-up, etc. If modifications to a design solution are required in order for it to meet the criteria, the design process can be repeated from the beginning.
At the end of every Design & Build challenge, students are encouraged to reflect on their experience in order to identify things that could be done better or differently in the future, such as how to work together as a group, manage resources and time, etc. Students are also encouraged to identify new problems or needs inspired by the Design & Build challenge.
References
International Technology and Engineering Educators Association. (n.d.). ITEEA homepage.
International Technology Education Association. (2003). Advancing excellence in technological literacy: student assessment, professional development, and program standards. ITEA.
International Technology Education Association. (2007). Standards for technological literacy: content for the study of technology. ITEA.
Teach Engineering.org (n.d.). Engineering design process.