Playful Machines
Participants construct a playground out of simple machines.
Welcome to the science of the school playground! Throughout this workshop, participants will make their own playground using simple machines. They will construct a spinning roundabout (wheel and axle), a slide (inclined plane) and teeter-totter (lever) using craft materials. For further exploration, participants will try to complete different balancing tasks by changing the fulcrum position on a lever and adding weights. To wrap-up, they will play a game that involves classifying simple machines.
What You Need
Activity 1: Roundabout
- Cut-out cardboard circles (1 per participant)
- Brass fasteners (1 per participant)
- Pipe cleaners, 15cm in length (1 per participant)
- Styrofoam base, paper plate or cardstock (1 per participant), big enough to fit all 3 playground structures
- Clear tape
- Roundabout Task Card
- Ruler
Activity 2: Slide
- Pipe cleaner, 15cm in length (1 per participant)
- Craft sticks (3 per participant)
- Clear tape
- Slide Task Card
Activity 3: Teeter-Totter
- Lever parts (to put on blackboard)
- Sample lever pictures
- Pipe cleaners, 15cm in length (2 per participant)
- Craft sticks (3 per participant)
- Straw (1/4 per participant)
- Clear tape
- Teeter-totter Task Card
- Sticky Tac
Lever Testing
- Beams (2)
- Fulcrums (2)
- Weights
- Lever Task Cards
Wrap-up
- Simple Machine Picture Cards
Guide:
What To Do
Activity Prep
- Cut cardboard rounds for Activity 1: Roundabout and straws into quarters for Activity 3: Teeter-totter.
- Make a sample of each activity to be used as a reference.
Introduction
- Introduce machines and explain how they make doing tasks easier.
- Explain simple machines and ask participants to provide examples of simple machines.
- The lever, wheel and axle and inclined plane.
- Explain the difference between simple and complex machines.
Activity 1: Roundabout
- Have participants write their name on the top of their baseboard. This will be their playground.
- To build the roundabout:
- Use a ruler to draw an X through the cardboard circle to find the middle.
- Make a hole where the X meets in the circle.
- Push the brass fastener through the hole and fasten the circle to the baseboard.
- To make handlebars, bend the pipe cleaner into a circle and tape it to the round piece of cardboard.
- They can now spin the roundabout.
- Label the roundabout “wheel and axle”.
Activity 2: Slide
- Tape the 3 popsicle sticks together side-by-side.
- Bend the middle of the pipe cleaner into a V, with the ends of the pipe cleaner remaining straight.
- Tape the bent pipe cleaner to one end of the popsicle sticks.
- Tape the ends of the pipe cleaner to the baseboard.
- Label the slide “inclined plane”.
Activity 3: Teeter-totter
- Tape the 3 popsicle sticks together (just like in Activity 2: Slide).
- Put both pipe cleaners through the piece of straw. The pipe cleaners should be side by side with the piece of straw in the middle of both pipe cleaners.
- Bend the pipe cleaners into a U with the straw in the middle, with the ends of the pipe cleaners remaining flat.
- Tape the bent part of the pipe cleaners (with the straw) to the middle of the popsicle sticks and the other ends of the pipe cleaners to the baseboard.
- Label the teeter-totter “lever”.
Lever Testing
- Separate participants into pairs and give each pair a beam, a fulcrum and some weights.
- Make a lever by balancing a beam on the fulcrum.
- Ask the following questions:
- Will your beam balance without any weights?
- If we wanted to add two weights, where do the weights have to be so that the beam balances?
- If a big person was on one side of a teeter-totter, could a small person sit on the other side to lift the big person up?
- Have participants place a heavy weight on one side of the fulcrum. Where does the lighter weight have to be so that the beam balances?
- If you move the fulcrum, can the beam still balance without the weights?
- If you move the fulcrum to one end of the beam, can you balance the beam using weights?
Wrap-up
- Optional: using the simple machines picture cards, play a wrap-up game (i.e. classification of simple machines, small group activity or concentration/memory game).
- Discuss possible careers related to the topics covered and what students would need to do (schooling, experience, etc…) to get into those careers.
Discovery
Machines are devices that make doing work easier. A machine makes work easier by changing the direction or reducing the amount of force (load) required to do the work. A simple machine is a single function device that does not have any source of power other than the human body.
Activity 1: Roundabout
The wheel and axle does work by moving or lifting loads. A wheel is a circular, round object. An axle is a post that fits in the middle of the wheel, which allows the wheel to turn. Working together, a wheel and axle can move objects across a distance. In this activity, participants make a roundabout using a cardboard circle (wheel) and a brass fastener (axel). Other examples of wheel and axles include bicycles, doorknobs and toy cars. Pulley systems are a modification of wheels and axles.
Activity 2: Slide
An inclined plane does work by moving objects up and down. An inclined plane looks like a board on an angle, with one end up in the air and the other end touching the ground. In this activity, participants construct a slide, which uses gravity to move the load from one place to another without having to exert much energy. Other examples of inclined planes include ramps and slopes.
Screws and wedges are modifications of inclined planes. Screws help us do work by holding things together and/or by lifting things (i.e. a car jack or jar lids). A wedge helps to do work by spreading or cutting an object apart (i.e. the head of an axe or pin).
Activity 3: Teeter-totter
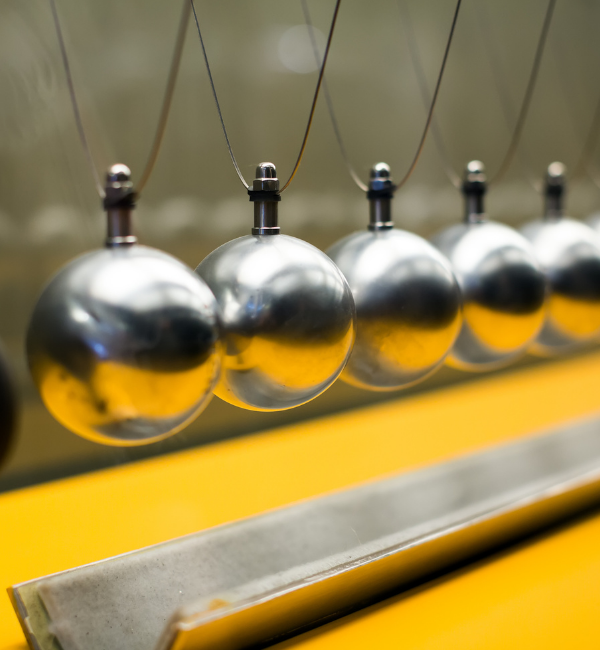
A lever does work by pivoting an object on an axis. There are four parts to a lever: a beam (bar), fulcrum (pivot point), load (output force) and effort (input force). The amount of force required to move an object on its axis is called Torque.
There are three classes of levers. A first class lever has the fulcrum in the middle between the effort and the load. When one side is pushed down, the other side goes up (i.e. teeter-totter).
In a second class lever, the effort is in the same direction as the load moves. The effort and the load are on the same side of the fulcrum with the load between the effort and the fulcrum (i.e wheelbarrow, door).
Finally, there is a third class lever. The effort is in the same direction as the load moves. The effort and the load are on the same side of the fulcrum with the effort between the load and the fulcrum (i.e. fishing pole, hammer).
Lever Testing
Without any weights, the lever will only balance when the fulcrum is in the middle of the beam. Similarly, if two equal weights are added to the lever, they must be on opposite sides and of equal distance from the fulcrum for the lever to balance. This is because the force of gravity is equal on both sides.
Uneven weights can be added and the lever will still balance as long as the heavier weight is closer to the fulcrum than the lighter one. That is, if one weight is twice as heavy, the other weight needs to be twice as far from the fulcrum in order for the lever to balance.
Simple machines make work easier and allow us to do things that are beyond our capabilities. Simple machines played a crucial role throughout human history and in shaping our modern world. For example, the wheel and axle is considered one of the most important human inventions of all time, as it made it easier to travel and move things far distances. Simple machines are the basis of many mechanisms that we use in our daily lives.
- For younger audiences, it is suggested that the activities be done in sequence as a group.
- For older audiences, stations can be set up for the participants to rotate through. Make sure to have enough materials at each station.
- In Activity 3: Teeter-totter, if the group is advanced you may want to include a discussion on second and third class levers. Use the classroom board or a poster to draw an example of each class of lever and discuss the differences.
Web
How Stuff Works- Block and Tackle (levers and pulleys)
Encyclopaedia Britannica- Simple Machine
Explain That Stuff- Tools and Simple Machines
Macaulay, D. (1988). The Way Things Work. New York: Houghton Mifflin Company. ISBN: 0-395-42857-2
Attachments
What's Happening?
Machines are devices that make doing work easier. A machine makes work easier by changing the direction or reducing the amount of force (load) required to do the work. A simple machine is a single function device that does not have any source of power other than the human body.
Activity 1: Roundabout
The wheel and axle does work by moving or lifting loads. A wheel is a circular, round object. An axle is a post that fits in the middle of the wheel, which allows the wheel to turn. Working together, a wheel and axle can move objects across a distance. In this activity, participants make a roundabout using a cardboard circle (wheel) and a brass fastener (axel). Other examples of wheel and axles include bicycles, doorknobs and toy cars. Pulley systems are a modification of wheels and axles.
Activity 2: Slide
An inclined plane does work by moving objects up and down. An inclined plane looks like a board on an angle, with one end up in the air and the other end touching the ground. In this activity, participants construct a slide, which uses gravity to move the load from one place to another without having to exert much energy. Other examples of inclined planes include ramps and slopes.
Screws and wedges are modifications of inclined planes. Screws help us do work by holding things together and/or by lifting things (i.e. a car jack or jar lids). A wedge helps to do work by spreading or cutting an object apart (i.e. the head of an axe or pin).
Activity 3: Teeter-totter
A lever does work by pivoting an object on an axis. There are four parts to a lever: a beam (bar), fulcrum (pivot point), load (output force) and effort (input force). The amount of force required to move an object on its axis is called Torque.
There are three classes of levers. A first class lever has the fulcrum in the middle between the effort and the load. When one side is pushed down, the other side goes up (i.e. teeter-totter).
In a second class lever, the effort is in the same direction as the load moves. The effort and the load are on the same side of the fulcrum with the load between the effort and the fulcrum (i.e wheelbarrow, door).
Finally, there is a third class lever. The effort is in the same direction as the load moves. The effort and the load are on the same side of the fulcrum with the effort between the load and the fulcrum (i.e. fishing pole, hammer).
Lever Testing
Without any weights, the lever will only balance when the fulcrum is in the middle of the beam. Similarly, if two equal weights are added to the lever, they must be on opposite sides and of equal distance from the fulcrum for the lever to balance. This is because the force of gravity is equal on both sides.
Uneven weights can be added and the lever will still balance as long as the heavier weight is closer to the fulcrum than the lighter one. That is, if one weight is twice as heavy, the other weight needs to be twice as far from the fulcrum in order for the lever to balance.
Why Does it Matter?
Simple machines make work easier and allow us to do things that are beyond our capabilities. Simple machines played a crucial role throughout human history and in shaping our modern world. For example, the wheel and axle is considered one of the most important human inventions of all time, as it made it easier to travel and move things far distances. Simple machines are the basis of many mechanisms that we use in our daily lives.
Investigate Further
- For younger audiences, it is suggested that the activities be done in sequence as a group.
- For older audiences, stations can be set up for the participants to rotate through. Make sure to have enough materials at each station.
- In Activity 3: Teeter-totter, if the group is advanced you may want to include a discussion on second and third class levers. Use the classroom board or a poster to draw an example of each class of lever and discuss the differences.
Resources
Web
How Stuff Works- Block and Tackle (levers and pulleys)
Encyclopaedia Britannica- Simple Machine
Explain That Stuff- Tools and Simple Machines
Macaulay, D. (1988). The Way Things Work. New York: Houghton Mifflin Company. ISBN: 0-395-42857-2