How can you design the least “expensive” water filter?
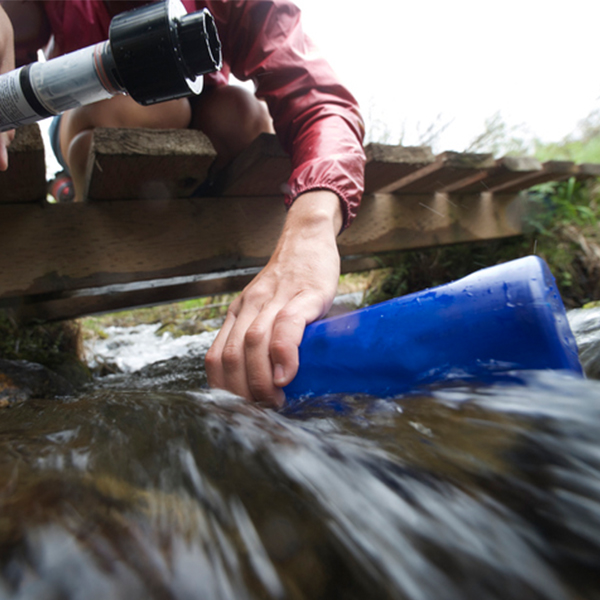
Hiker filling a water bottle (Hagephoto, Getty Images)
Hiker filling a water bottle (Hagephoto, Getty Images)
How does this align with my curriculum?
Challenge yourself to design the best filter for the lowest cost!
Consider using the Design & Build Process with this challenge.
This activity will help build skills related to the Generate Ideas, Plan, Create, and Test & Evaluate phases of this process. It also highlights the iteration required during this process.
Materials:
Note: Use the dollar values below when calculating the “cost” of your device.
Tools (no charge)
- Scissors
- Recycled bottle (i.e., plastic water bottle) for collecting the filtered water
Dirty Water Solution (no charge)
- 500 mL recycled plastic bottle with lid
- Measuring cup
- Water (approximately 400 mL)
- Sand (approximately 15 mL)
- Dirt/soil (approximately 15 mL)
Filter Materials
- Recycled plastic water bottle ($1)
- 1 coffee filter ($1)
- 1 paper towel ($1)
- 10 cotton balls ($0.25 each)
- 50 mL clean gravel ($5)
- 15 cm x 15 cm nylon stocking ($5)
- 1 old sock ($5)
What to do!
Have you ever wondered how water treatment plants remove solid particles from water? They use filters. Your challenge is to design and build a filter using materials you might find around the house.
Tips and Hints
- Before testing, make up some “dirty water” by putting the water, sand and dirt into the 500 ML plastic bottle. Close the lid and shake well.
- Generate Ideas – Think about what materials you think would let water pass through but not let solids pass through.
- Plan – Create drawings for what you want your design to look like. Think about the costs of the materials before deciding the quantity and types of materials you will use.
- Create – Build a prototype. This is a working model that you will be able to test. Use the empty plastic bottle for the “clean” water.
- Test - When you are satisfied with your prototype, it is time to test it. Pour the dirty water through the filter and catch the clean water in the empty bottle.
- Evaluate - If the water still looks dirty, try again. Think about the types of materials you used, the order of the materials and their quantity. Continue to refine your device until the water looks clear.
*Note: do not drink your filtered water even if it appears clean!!
Given the materials you used, what would be the cost of your device?
Discovery
Solid particles mixed in water can be removed using a filter. A filter is a device with small holes or spaces. Water can pass through the spaces. But particles larger than the spaces will get caught in the filter, removing them from the water.
Filters come in different shapes and sizes. They are also made of different materials, as you’ve seen in this activity. Did you notice the materials that got the water the cleanest also took the most time? That’s because, the smaller the spaces, the longer it will take for the water to travel through them. Think of sand and gravel. Sand particles can get very close together and leave only small spaces between them. Gravel is much larger, and the pieces can’t get as close together. This leaves larger spaces between the particles. The larger the spaces, the faster the flow of water. Because materials with small spaces trap more solids, they can get clogged over time. This is why filters need to be cleaned.
The filters that you’ve made in this activity can remove larger particles from water. They cannot remove small particles like bacteria. That’s why water treatment has many steps. The first step involves doing what you just did - filtering out the larger particles! This is usually done with a screen. Other steps remove smaller particles using screens with smaller holes, and chemicals that make particles clump up and sink to the bottom. The final step involves treating the water with chemicals that kill microorganisms.

Municipal water treatment process (©2020 Let’s Talk Science).
Image - Text Version
Shown is a colour gif of water moving through four steps of treatment. The animation shows liquid moving through the stages in a grey pipe. The liquid begins as dark green, becomes light green, yellow, and ends as teal. The title of each stage is highlighted in yellow when the liquid reaches it. A label with more information about each stage appears below the pipe at the same time. Starting on the left, the first stage is titled “Pre-treatment.” Here, water from precipitation, watersheds and groundwater moves into a small grey building through a pipe. This is shown as a green liquid. A symbol above the water sources is a gleaming water droplet. A symbol next to the building shows waves in a circle made from curved arrows. The liquid flows through a grey screen and a bottle, can, and other garbage appear above it. A label appears below reading “Screens out large debris.” The next stage is titled “Flocculation.” Here, the water flows through something that looks like a large funnel filled with small orange spheres. A symbol next to it shows a person in a hard hat. A label appears below reading “Captures and removes small debris, silt, and microorganisms.” The liquid becomes light green after this stage. The third stage is titled “Filtration.” Here, the water flows through a larger, darker screen. A label appears below reading “Sand, carbon and coal filter out remaining particles. The liquid becomes yellow after this stage. The fourth stage is titled “Disinfection.” Here, the liquid flows through what looks like a large grey bowl. Above, a jug pours dark blue liquid into it. A label appears above reading, “Chlorine added to kill any remaining microorganisms.” In the bowl, the liquid turns from yellow to teal, and two white starbursts appear in it. Below, a long rectangle with rounded ends is red on the left, and gradually becomes blue on right end. This is labelled “ph adjusted.” The final stage is labelled “Distribution.” Here, the pipe full of teal liquid leads up into a water tower and below two houses. A label appears below reading “Clean water is pumped to homes and businesses.”
In the past, people often thought wetlands were useless land. Scientists now have a better understanding of wetlands. They know they are important water reserves and water filters. They can remove particles, fertilizers and toxic pollutants from the water. Wetlands can also act like giant sponges during floods. They help absorb excess water and keep our homes from flooding.
Large areas of Canada’s natural wetlands, especially in populated areas, have been cleared to make room for agriculture and housing. This is why it is important to protect the ones that remain. This is especially important in populated areas where they can help prevent damage from floods.
- Can you make a ‘cheaper’ filter that works as well as a more ‘expensive’ one?
- What other materials can you use in your filter to make even cleaner water?
- Where else can you find water filters?
Clothing4Climate - Water Systems
Learn about the impacts of the clothing on water systems in this project by Let’s Talk Science.
Water Treatment
Learn about how water is treated at municipal water treatment plants.
What’s happening?
Solid particles mixed in water can be removed using a filter. A filter is a device with small holes or spaces. Water can pass through the spaces. But particles larger than the spaces will get caught in the filter, removing them from the water.
Filters come in different shapes and sizes. They are also made of different materials, as you’ve seen in this activity. Did you notice the materials that got the water the cleanest also took the most time? That’s because, the smaller the spaces, the longer it will take for the water to travel through them. Think of sand and gravel. Sand particles can get very close together and leave only small spaces between them. Gravel is much larger, and the pieces can’t get as close together. This leaves larger spaces between the particles. The larger the spaces, the faster the flow of water. Because materials with small spaces trap more solids, they can get clogged over time. This is why filters need to be cleaned.
The filters that you’ve made in this activity can remove larger particles from water. They cannot remove small particles like bacteria. That’s why water treatment has many steps. The first step involves doing what you just did - filtering out the larger particles! This is usually done with a screen. Other steps remove smaller particles using screens with smaller holes, and chemicals that make particles clump up and sink to the bottom. The final step involves treating the water with chemicals that kill microorganisms.
Municipal water treatment process (©2020 Let’s Talk Science).
Image - Text Version
Shown is a colour gif of water moving through four steps of treatment. The animation shows liquid moving through the stages in a grey pipe. The liquid begins as dark green, becomes light green, yellow, and ends as teal. The title of each stage is highlighted in yellow when the liquid reaches it. A label with more information about each stage appears below the pipe at the same time. Starting on the left, the first stage is titled “Pre-treatment.” Here, water from precipitation, watersheds and groundwater moves into a small grey building through a pipe. This is shown as a green liquid. A symbol above the water sources is a gleaming water droplet. A symbol next to the building shows waves in a circle made from curved arrows. The liquid flows through a grey screen and a bottle, can, and other garbage appear above it. A label appears below reading “Screens out large debris.” The next stage is titled “Flocculation.” Here, the water flows through something that looks like a large funnel filled with small orange spheres. A symbol next to it shows a person in a hard hat. A label appears below reading “Captures and removes small debris, silt, and microorganisms.” The liquid becomes light green after this stage. The third stage is titled “Filtration.” Here, the water flows through a larger, darker screen. A label appears below reading “Sand, carbon and coal filter out remaining particles. The liquid becomes yellow after this stage. The fourth stage is titled “Disinfection.” Here, the liquid flows through what looks like a large grey bowl. Above, a jug pours dark blue liquid into it. A label appears above reading, “Chlorine added to kill any remaining microorganisms.” In the bowl, the liquid turns from yellow to teal, and two white starbursts appear in it. Below, a long rectangle with rounded ends is red on the left, and gradually becomes blue on right end. This is labelled “ph adjusted.” The final stage is labelled “Distribution.” Here, the pipe full of teal liquid leads up into a water tower and below two houses. A label appears below reading “Clean water is pumped to homes and businesses.”
Why does it matter?
In the past, people often thought wetlands were useless land. Scientists now have a better understanding of wetlands. They know they are important water reserves and water filters. They can remove particles, fertilizers and toxic pollutants from the water. Wetlands can also act like giant sponges during floods. They help absorb excess water and keep our homes from flooding.
Large areas of Canada’s natural wetlands, especially in populated areas, have been cleared to make room for agriculture and housing. This is why it is important to protect the ones that remain. This is especially important in populated areas where they can help prevent damage from floods.
Investigate further!
- Can you make a ‘cheaper’ filter that works as well as a more ‘expensive’ one?
- What other materials can you use in your filter to make even cleaner water?
- Where else can you find water filters?
Learn More
Clothing4Climate - Water Systems
Learn about the impacts of the clothing on water systems in this project by Let’s Talk Science.
Water Treatment
Learn about how water is treated at municipal water treatment plants.