Design & Build a Soil Sifter
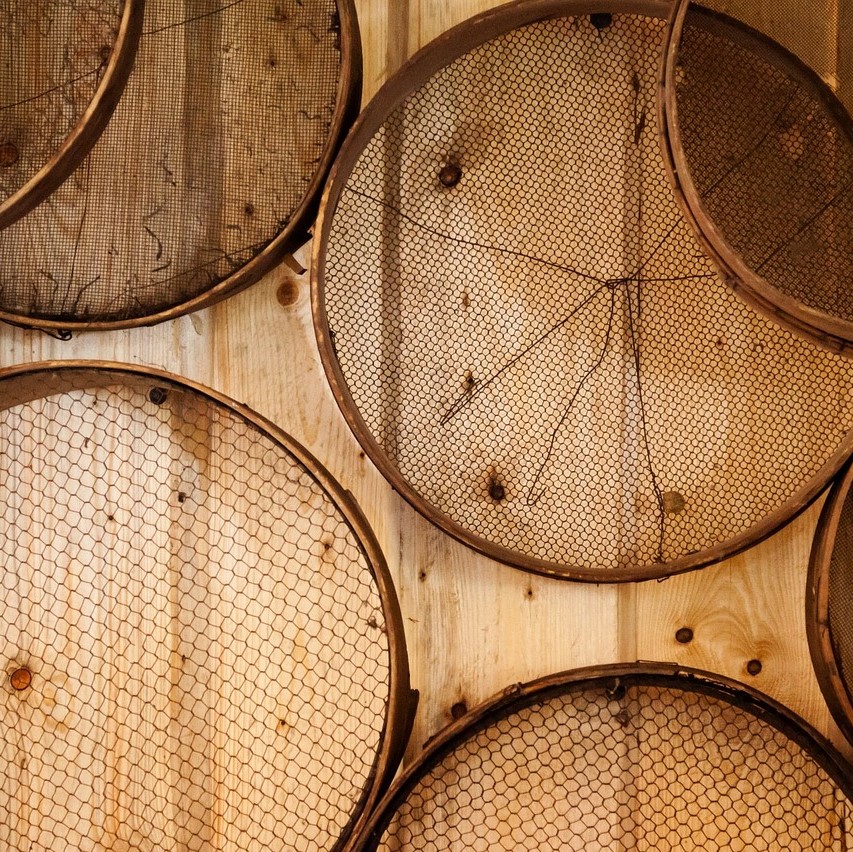
Assortment of wooden sieves (PublicDomainPictures, Pixabay)

Assortment of wooden sieves (PublicDomainPictures, Pixabay)
How does this align with my curriculum?
| Grade | Course | Topic |
|---|
Students will work collaboratively to design and build a sifter that separates soil according to particle size.
Overview
| Activities | Timing | Student grouping | Description |
|---|---|---|---|
| Minds-On: Research and Understand the Problem | 15 - 30 minutes | Large group | Students activate their prior knowledge regarding soil and learn about sifters |
| Action: Design, Build and Test a Prototype | 40 - 60 minutes | Small group | Students design, build and test a soil sifter |
| Consolidation: Communicate the Solution | 20 - 30 minutes | Individual | Students show and share their soil sifter with the class and complete a reflection |
This lesson can be done over a few days.
Students will:
- Learn about tools used to sort materials by size
- Understand the purpose of soil sifters
- Use a collaborative engineering design process and associated skills to safely design and build a practical device
Learning Goals
Students will:
- Learn about tools used to sort materials by size
- Understand the purpose of soil sifters
- Use a collaborative engineering design process and associated skills to safely design and build a practical device
Students can:
- Actively participate during the large group discussion about soil and tools used to sort objects by size
- Make insightful observations about soil texture while sorting soil by particle size
- Successfully create soil sifters that meet established criteria
- Reflect on the design process and identify successes and areas of improvement
Success Criteria
Students can:
- Actively participate during the large group discussion about soil and tools used to sort objects by size
- Make insightful observations about soil texture while sorting soil by particle size
- Successfully create soil sifters that meet established criteria
- Reflect on the design process and identify successes and areas of improvement
This icon indicates potential assessment opportunities.
Observations
- Observe and record anecdotally students ability to actively listen during large group discussions (Minds-on, Consolidation)
- Listen to and record students as they share ideas for the criteria of the soil sifter (Action)
- Observe and record using audio or video how students plan to go about building their soil sifters (Action)
- Observe and record students’ safe use of tools and materials (Action)
Conversations
- Talk with students about their design sketches. Encourage students to describe their sketches in words and explain how their ideas meet the design criteria (Action)
- Talk with students about the process of building their soil sifters, including challenges they encountered and how they overcame them (Consolidation)
Products
- Students test their soil sifters against the class criteria and record successful completion on a checklist (Action)
- Students could make labelled drawings of their soil sifters on the Soil Sifter Sketch and Plan reproducible (Action)
- Students could consolidate their learning about the soil sifter design process by completing their I Can Statements, and completing a short reflection (Consolidation)
Evidence of Student Learning
This icon indicates potential assessment opportunities.
Observations
- Observe and record anecdotally students ability to actively listen during large group discussions (Minds-on, Consolidation)
- Listen to and record students as they share ideas for the criteria of the soil sifter (Action)
- Observe and record using audio or video how students plan to go about building their soil sifters (Action)
- Observe and record students’ safe use of tools and materials (Action)
Conversations
- Talk with students about their design sketches. Encourage students to describe their sketches in words and explain how their ideas meet the design criteria (Action)
- Talk with students about the process of building their soil sifters, including challenges they encountered and how they overcame them (Consolidation)
Products
- Students test their soil sifters against the class criteria and record successful completion on a checklist (Action)
- Students could make labelled drawings of their soil sifters on the Soil Sifter Sketch and Plan reproducible (Action)
- Students could consolidate their learning about the soil sifter design process by completing their I Can Statements, and completing a short reflection (Consolidation)
Students will:
- Learn about tools used to sort materials by size
- Understand the purpose of soil sifters
- Use a collaborative engineering design process and associated skills to safely design and build a practical device
Learning Goals
Students will:
- Learn about tools used to sort materials by size
- Understand the purpose of soil sifters
- Use a collaborative engineering design process and associated skills to safely design and build a practical device
Students can:
- Actively participate during the large group discussion about soil and tools used to sort objects by size
- Make insightful observations about soil texture while sorting soil by particle size
- Successfully create soil sifters that meet established criteria
- Reflect on the design process and identify successes and areas of improvement
Success Criteria
Students can:
- Actively participate during the large group discussion about soil and tools used to sort objects by size
- Make insightful observations about soil texture while sorting soil by particle size
- Successfully create soil sifters that meet established criteria
- Reflect on the design process and identify successes and areas of improvement
This icon indicates potential assessment opportunities.
Observations
- Observe and record anecdotally students ability to actively listen during large group discussions (Minds-on, Consolidation)
- Listen to and record students as they share ideas for the criteria of the soil sifter (Action)
- Observe and record using audio or video how students plan to go about building their soil sifters (Action)
- Observe and record students’ safe use of tools and materials (Action)
Conversations
- Talk with students about their design sketches. Encourage students to describe their sketches in words and explain how their ideas meet the design criteria (Action)
- Talk with students about the process of building their soil sifters, including challenges they encountered and how they overcame them (Consolidation)
Products
- Students test their soil sifters against the class criteria and record successful completion on a checklist (Action)
- Students could make labelled drawings of their soil sifters on the Soil Sifter Sketch and Plan reproducible (Action)
- Students could consolidate their learning about the soil sifter design process by completing their I Can Statements, and completing a short reflection (Consolidation)
Evidence of Student Learning
This icon indicates potential assessment opportunities.
Observations
- Observe and record anecdotally students ability to actively listen during large group discussions (Minds-on, Consolidation)
- Listen to and record students as they share ideas for the criteria of the soil sifter (Action)
- Observe and record using audio or video how students plan to go about building their soil sifters (Action)
- Observe and record students’ safe use of tools and materials (Action)
Conversations
- Talk with students about their design sketches. Encourage students to describe their sketches in words and explain how their ideas meet the design criteria (Action)
- Talk with students about the process of building their soil sifters, including challenges they encountered and how they overcame them (Consolidation)
Products
- Students test their soil sifters against the class criteria and record successful completion on a checklist (Action)
- Students could make labelled drawings of their soil sifters on the Soil Sifter Sketch and Plan reproducible (Action)
- Students could consolidate their learning about the soil sifter design process by completing their I Can Statements, and completing a short reflection (Consolidation)
Materials and Preparation
| Material/Technology/Setting | Quantity |
|---|---|
|
For small group work |
|
1 per student |
*Optional - to provide context and background information |
For teacher use |
Materials
| Material/Technology/Setting | Quantity |
|---|---|
|
For small group work |
|
1 per student |
*Optional - to provide context and background information |
For teacher use |
- Collect the materials that students will use to construct the soil sifters and pre-cut any materials that are not safe or practical for students to cut in the classroom.
- Set up material sourcing stations, organized by type of material. Alternatively, organize an assortment of materials to be provided to each student or work group.
- Demonstrate how to safely and correctly use all the tools that are provided.
- Familiarize yourself with the Design & Build (Engineering design) process.
- Working with soils is messy. Consider collecting newspapers to cover tables or using plastic tablecloths to facilitate cleaning up after the Design and Build.
- Reading the backgrounder The Dirt on Soil Conservation before teaching this lesson is recommended.
Preparation
- Collect the materials that students will use to construct the soil sifters and pre-cut any materials that are not safe or practical for students to cut in the classroom.
- Set up material sourcing stations, organized by type of material. Alternatively, organize an assortment of materials to be provided to each student or work group.
- Demonstrate how to safely and correctly use all the tools that are provided.
- Familiarize yourself with the Design & Build (Engineering design) process.
- Working with soils is messy. Consider collecting newspapers to cover tables or using plastic tablecloths to facilitate cleaning up after the Design and Build.
- Reading the backgrounder The Dirt on Soil Conservation before teaching this lesson is recommended.
- Students should participate in the What is soil made of? lesson before doing this lesson.
Student Prior Knowledge and Skills
- Students should participate in the What is soil made of? lesson before doing this lesson.
| Material/Technology/Setting | Quantity |
|---|---|
|
For small group work |
|
1 per student |
*Optional - to provide context and background information |
For teacher use |
Materials
| Material/Technology/Setting | Quantity |
|---|---|
|
For small group work |
|
1 per student |
*Optional - to provide context and background information |
For teacher use |
- Collect the materials that students will use to construct the soil sifters and pre-cut any materials that are not safe or practical for students to cut in the classroom.
- Set up material sourcing stations, organized by type of material. Alternatively, organize an assortment of materials to be provided to each student or work group.
- Demonstrate how to safely and correctly use all the tools that are provided.
- Familiarize yourself with the Design & Build (Engineering design) process.
- Working with soils is messy. Consider collecting newspapers to cover tables or using plastic tablecloths to facilitate cleaning up after the Design and Build.
- Reading the backgrounder The Dirt on Soil Conservation before teaching this lesson is recommended.
Preparation
- Collect the materials that students will use to construct the soil sifters and pre-cut any materials that are not safe or practical for students to cut in the classroom.
- Set up material sourcing stations, organized by type of material. Alternatively, organize an assortment of materials to be provided to each student or work group.
- Demonstrate how to safely and correctly use all the tools that are provided.
- Familiarize yourself with the Design & Build (Engineering design) process.
- Working with soils is messy. Consider collecting newspapers to cover tables or using plastic tablecloths to facilitate cleaning up after the Design and Build.
- Reading the backgrounder The Dirt on Soil Conservation before teaching this lesson is recommended.
- Students should participate in the What is soil made of? lesson before doing this lesson.
Student Prior Knowledge and Skills
- Students should participate in the What is soil made of? lesson before doing this lesson.
Teaching and Learning Activities
This icon indicates potential assessment opportunities.
Minds-On: Research and Understand the Problem (15 - 30 min.)
| Instructions | Teaching Tips |
|---|---|
|
Activate prior knowledge by having students share what they already know about soil and its texture. Alternatively, do the What is soil made of? lesson before completing this Build & Design lesson. |
DiscussionsDiscussion prompts can include:
IdeaIf you want to provide more context before you begin the activity, show students the short slideshow Soil Texture [Google slides] [pptx] [PDF]. On each slide, encourage classroom discussion using the titles as guiding questions. |
|
Introduce sifters by showing students examples of common strainers and sifters (e.g., flour sifter, strainer, colander, tea strainer, metal coffee filter, tea bag) in the classroom. Facilitate a group discussion regarding the function of these objects. Listen for student understanding that sifters separate materials by size. |
IdeaIf you are unable to get strainers and sifters in the classroom show the short slideshow Sifters [Google slides] [pptx] [PDF] instead. From an indigenous perspective, fishing nets and fishing weirs are a form of sieves/sifters. Many cultures have similar devices for catching and holding fish. Images and VideosFor students with visual impairments, describe each of the objects in detail. DiscussionsDiscussion prompts can include:
|
|
Facilitate a free exploration with the soil and the objects for sifting (plastic mesh, funnels, cups, cups, hands, etc.). Have students test which objects work best for sifting. Circulate the classroom to encourage inquiry. During free exploration, have conversations with students about the soil sifters they will be building. |
IdeaEncourage students to collect soil from where they live and bring it in. Or take students into the school yard and dig up soil. If students are unable to collect soil, provide them with potting soil. DiscussionsSupport students' decision making process by asking them questions regarding their process:
|
Action: Design, Build and Test a Prototype (40 - 60 min.)
| Instructions | Teaching Tips |
|---|---|
|
Co-construct success criteria that the prototype sifter must meet. These criteria will be the basis of a peer sharing activity. During co-construction, have conversations with students about how they plan to build their sifters. Suggest criteria include:
|
DiscussionsSome potential questions could be:
|
|
Have students complete the Build a Soil Sifter Design Sketch Plan [Google doc] [Word doc] [PDF]. Space is provided for both rough sketches (page 1) and a good sketch (page 2). 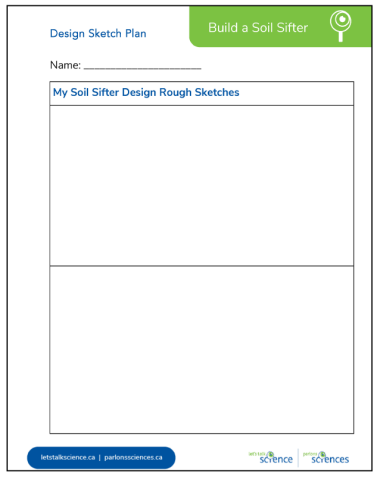
This could also be done using Google draw or a jamboard if students are working virtually. |
IdeaOn a whiteboard or chalkboard demonstrate how to label a design image. Show students how to label what materials they will be using and the different parts of the design. |
|
Have students identify the steps they undertake as they build their sifter based on the Design Sketch. Space is provided for this on page 3 of the reproducible. 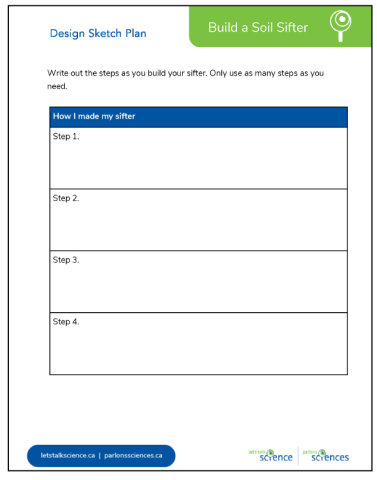
|
SafetyReview how to safely use all provided tools and materials. |
|
Once they have completed sifters, have students test the sifters to determine if they meet the design criteria. If they do not after the first test, encourage students to make changes to the design and test again until they are successful. 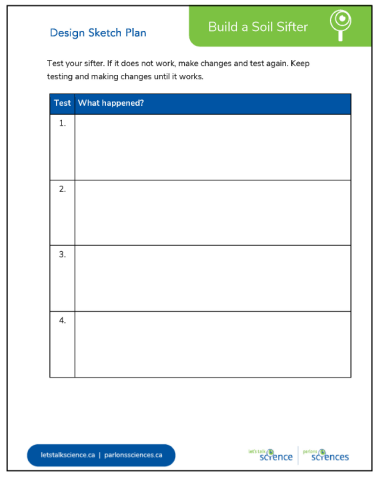
|
Consolidation: Communicate the Solution (20 - 30 min.)
| Instructions | Teaching Tips |
|---|---|
|
Have students complete My Soil Sifter: I Can Statements [Google doc] [Word doc] [PDF] 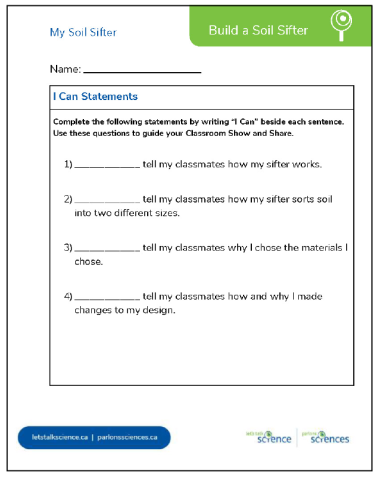
Students will use their completed I Can Statements as a guide for the show and share. Give students about five minutes each to orally present their sifters to their classmates. |
IdeaStudents could create multimedia projects such as short videos, slideshows, posters, or mini science displays to present their soil sifters. |
|
Have students fill out the My Soil Sifter: Reflection reproducible [Google doc] [Word doc] [PDF] independently or in a group depending on how they worked on their projects. 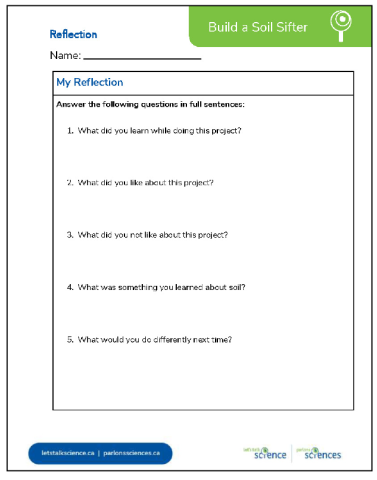
|
IdeaShow students the image gallery Careers: Soil Science and discuss the practical applications of soil sifters related to careers in soil science. Some potential questions could be:
|
Background Information for Teachers
A sifter is a tool that separates particles of a substance by size.
Since soil is a mixture of rock particles of different sizes, it can be helpful to separate soils to use them for different purposes.
For example, it is easier to plant seeds and seedlings and to pull weeds in garden soil that has few stones in it.
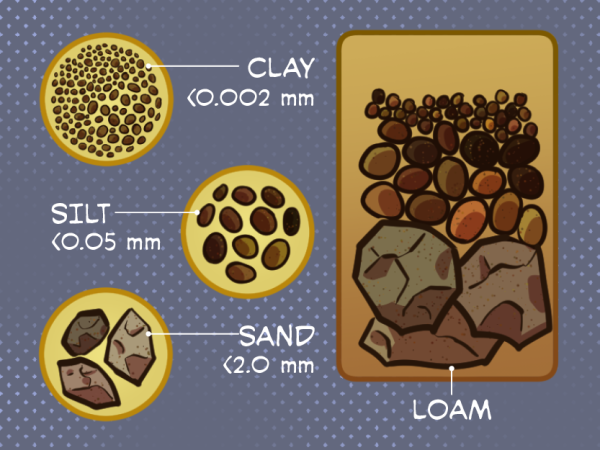
Image - Text Version
Shown is a colour illustration of samples of clay, silt, sand and loam, on a grey background.
On the left are three round sections with magnified views, as if through a microscope.
The top one is labelled "Clay <0.002 mm." The background is gold, and the circle is filled with small, brown, round and oval particles.
The circle below is labelled "Silt <0.05 mm." It is filled with larger, oval-shaped particles in shades of brown.
The bottom circle is labelled "Sand <2.0 mm." It contains three beige polygon-shaped particles with sharp corners and flat planes.
The section on the right is a vertical rectangle. This is labelled "Loam." It contains sand at the bottom, silt in the middle, and clay at the top. All the particles are layered together.
Archeologists sift soil to find artifacts and palaeontologists sift soil to find fossils.
Sometimes water is used to wash small particles through the sifter as is shown in the picture on the right.
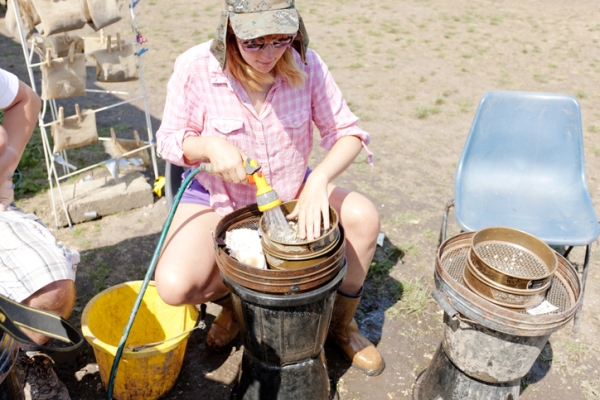
Image - Text Version
Shown is a colour photograph of a person spraying water into a sifter.
The person sits on a plastic chair, with one knee on either side of a black plastic bucket. Below, a second bucket is turned upside down, to raise the level of the first. There is a large sifter on the rim of the top bucket, and a smaller sifter inside the first.
The person is holding a green garden hose with a yellow spray nozzle in their right hand, spraying water into the top sifter. They are stretching the fingers of their left hand over the contents of the sifter.
The person is wearing shorts, leather hiking boots, a pink checkered shirt, sunglasses, and a beige hat with a wide bill and cloth hanging down the back and sides.
There is an empty blue plastic chair on the right, behind another set of buckets and filters. Another person's knee and elbow are just visible along the left edge of the photograph. Behind them, clear plastic bags are fastened with clothespins to a white drying rack. The land in the background is dry and arid, scattered with a few small, green plants.
Additional Resources
Reproducibles
- Soil Texture [Google slides] [pptx] [PDF]
- Sifters [Google slides] [pptx] [PDF]
- Build a Soil Sifter Design Sketch Plan [Google doc] [Word doc] [PDF]
- My Soil Sifter: I Can Statements [Google doc] [Word doc] [PDF]
- My Soil Sifter: Reflection [Google doc] [Word doc] [PDF]
Reproducibles and Media
Reproducibles
- Soil Texture [Google slides] [pptx] [PDF]
- Sifters [Google slides] [pptx] [PDF]
- Build a Soil Sifter Design Sketch Plan [Google doc] [Word doc] [PDF]
- My Soil Sifter: I Can Statements [Google doc] [Word doc] [PDF]
- My Soil Sifter: Reflection [Google doc] [Word doc] [PDF]
Science
- Invite an archeologist, palaeontologist or soil scientist to the classroom or via video call to explain how they use soil sifters in their work.
- Students could adapt a sifter to sift more than one size of particle.
- Students could consider how to use their sifters to remove materials from water. In this case, the sifter is acting as a filter.
- If students made sifters by punching holes, have them try making a sifter using woven material. Students may recognize woven baskets or bird nests as sifters since water and fine particles can pass through them.
Mathematical Thinking
- Students could measure mass and time using standard units (e.g., take measurements of the particle sizes in a soil mixture in preparation for designing the sifter; record how long it takes to sift a sample of soil)
- Students could compare, describe and order objects using attributes measured in standard units (e.g., describe and order the screens and/or sieves for the soil sifter)
Computational Thinking
- Students could document the process of building their soil sifters as an algorithm.
Visual Arts
- Facilitate a paint with soil activity. Using the various sifted soil samples, students could mix them with small amounts of water and/or whie glue to make a paint-like paste. They can also use a variety of different soil samples for different pigmentation. You may wish to set up painting stations with different coloured soil “paints.” Have students create designs and images using the paints. For a more scaffolded experience, show students the video Painting with Soil from Duke Gardens that illustrates how to create soil paint.
Extensions
Science
- Invite an archeologist, palaeontologist or soil scientist to the classroom or via video call to explain how they use soil sifters in their work.
- Students could adapt a sifter to sift more than one size of particle.
- Students could consider how to use their sifters to remove materials from water. In this case, the sifter is acting as a filter.
- If students made sifters by punching holes, have them try making a sifter using woven material. Students may recognize woven baskets or bird nests as sifters since water and fine particles can pass through them.
Mathematical Thinking
- Students could measure mass and time using standard units (e.g., take measurements of the particle sizes in a soil mixture in preparation for designing the sifter; record how long it takes to sift a sample of soil)
- Students could compare, describe and order objects using attributes measured in standard units (e.g., describe and order the screens and/or sieves for the soil sifter)
Computational Thinking
- Students could document the process of building their soil sifters as an algorithm.
Visual Arts
- Facilitate a paint with soil activity. Using the various sifted soil samples, students could mix them with small amounts of water and/or whie glue to make a paint-like paste. They can also use a variety of different soil samples for different pigmentation. You may wish to set up painting stations with different coloured soil “paints.” Have students create designs and images using the paints. For a more scaffolded experience, show students the video Painting with Soil from Duke Gardens that illustrates how to create soil paint.
How to make a soil sieve from cardboard (2021)
This video (10:22 min.), from Odd Bonsai outlines an effective way to build a soil sieve using common materials.
Occupational Video - Soil Scientist (2021)
This video (5:21 min.), from alisWebsite demonstrates what kinds of things soil scientists do.
Careers: Soil Scientist
Here you will find five images work that a scientist who studies the Earth's soil might do, such as classifying types of soil and measuring the slope of soil.
Sifting Through History: The Archaeology Field School
In this video (2:42 min.) you can see soil sifters in action at an archaeology field school.
Solving Mysteries with Archaeologists!
This video from SciShow Kids (4:36 min.) explains how archeologists look for, and dig up, artifacts.
Palmetto Fossil Excursions: Sifting Island
In this video (1:09 min.) see how kids use soil sifters to find fossil shark teeth.
Learn More
How to make a soil sieve from cardboard (2021)
This video (10:22 min.), from Odd Bonsai outlines an effective way to build a soil sieve using common materials.
Occupational Video - Soil Scientist (2021)
This video (5:21 min.), from alisWebsite demonstrates what kinds of things soil scientists do.
Careers: Soil Scientist
Here you will find five images work that a scientist who studies the Earth's soil might do, such as classifying types of soil and measuring the slope of soil.
Sifting Through History: The Archaeology Field School
In this video (2:42 min.) you can see soil sifters in action at an archaeology field school.
Solving Mysteries with Archaeologists!
This video from SciShow Kids (4:36 min.) explains how archeologists look for, and dig up, artifacts.
Palmetto Fossil Excursions: Sifting Island
In this video (1:09 min.) see how kids use soil sifters to find fossil shark teeth.
Mathematics and Science Centre (n.d.). Soil Texture Using a Soil Sieve.
Virginia Cooperative Extension (2016). Understanding the Texture of Your Soil for Agricultural Productivity.
References
Mathematics and Science Centre (n.d.). Soil Texture Using a Soil Sieve.
Virginia Cooperative Extension (2016). Understanding the Texture of Your Soil for Agricultural Productivity.
Reproducibles
- Soil Texture [Google slides] [pptx] [PDF]
- Sifters [Google slides] [pptx] [PDF]
- Build a Soil Sifter Design Sketch Plan [Google doc] [Word doc] [PDF]
- My Soil Sifter: I Can Statements [Google doc] [Word doc] [PDF]
- My Soil Sifter: Reflection [Google doc] [Word doc] [PDF]
Reproducibles and Media
Reproducibles
- Soil Texture [Google slides] [pptx] [PDF]
- Sifters [Google slides] [pptx] [PDF]
- Build a Soil Sifter Design Sketch Plan [Google doc] [Word doc] [PDF]
- My Soil Sifter: I Can Statements [Google doc] [Word doc] [PDF]
- My Soil Sifter: Reflection [Google doc] [Word doc] [PDF]
Science
- Invite an archeologist, palaeontologist or soil scientist to the classroom or via video call to explain how they use soil sifters in their work.
- Students could adapt a sifter to sift more than one size of particle.
- Students could consider how to use their sifters to remove materials from water. In this case, the sifter is acting as a filter.
- If students made sifters by punching holes, have them try making a sifter using woven material. Students may recognize woven baskets or bird nests as sifters since water and fine particles can pass through them.
Mathematical Thinking
- Students could measure mass and time using standard units (e.g., take measurements of the particle sizes in a soil mixture in preparation for designing the sifter; record how long it takes to sift a sample of soil)
- Students could compare, describe and order objects using attributes measured in standard units (e.g., describe and order the screens and/or sieves for the soil sifter)
Computational Thinking
- Students could document the process of building their soil sifters as an algorithm.
Visual Arts
- Facilitate a paint with soil activity. Using the various sifted soil samples, students could mix them with small amounts of water and/or whie glue to make a paint-like paste. They can also use a variety of different soil samples for different pigmentation. You may wish to set up painting stations with different coloured soil “paints.” Have students create designs and images using the paints. For a more scaffolded experience, show students the video Painting with Soil from Duke Gardens that illustrates how to create soil paint.
Extensions
Science
- Invite an archeologist, palaeontologist or soil scientist to the classroom or via video call to explain how they use soil sifters in their work.
- Students could adapt a sifter to sift more than one size of particle.
- Students could consider how to use their sifters to remove materials from water. In this case, the sifter is acting as a filter.
- If students made sifters by punching holes, have them try making a sifter using woven material. Students may recognize woven baskets or bird nests as sifters since water and fine particles can pass through them.
Mathematical Thinking
- Students could measure mass and time using standard units (e.g., take measurements of the particle sizes in a soil mixture in preparation for designing the sifter; record how long it takes to sift a sample of soil)
- Students could compare, describe and order objects using attributes measured in standard units (e.g., describe and order the screens and/or sieves for the soil sifter)
Computational Thinking
- Students could document the process of building their soil sifters as an algorithm.
Visual Arts
- Facilitate a paint with soil activity. Using the various sifted soil samples, students could mix them with small amounts of water and/or whie glue to make a paint-like paste. They can also use a variety of different soil samples for different pigmentation. You may wish to set up painting stations with different coloured soil “paints.” Have students create designs and images using the paints. For a more scaffolded experience, show students the video Painting with Soil from Duke Gardens that illustrates how to create soil paint.
How to make a soil sieve from cardboard (2021)
This video (10:22 min.), from Odd Bonsai outlines an effective way to build a soil sieve using common materials.
Occupational Video - Soil Scientist (2021)
This video (5:21 min.), from alisWebsite demonstrates what kinds of things soil scientists do.
Careers: Soil Scientist
Here you will find five images work that a scientist who studies the Earth's soil might do, such as classifying types of soil and measuring the slope of soil.
Sifting Through History: The Archaeology Field School
In this video (2:42 min.) you can see soil sifters in action at an archaeology field school.
Solving Mysteries with Archaeologists!
This video from SciShow Kids (4:36 min.) explains how archeologists look for, and dig up, artifacts.
Palmetto Fossil Excursions: Sifting Island
In this video (1:09 min.) see how kids use soil sifters to find fossil shark teeth.
Learn More
How to make a soil sieve from cardboard (2021)
This video (10:22 min.), from Odd Bonsai outlines an effective way to build a soil sieve using common materials.
Occupational Video - Soil Scientist (2021)
This video (5:21 min.), from alisWebsite demonstrates what kinds of things soil scientists do.
Careers: Soil Scientist
Here you will find five images work that a scientist who studies the Earth's soil might do, such as classifying types of soil and measuring the slope of soil.
Sifting Through History: The Archaeology Field School
In this video (2:42 min.) you can see soil sifters in action at an archaeology field school.
Solving Mysteries with Archaeologists!
This video from SciShow Kids (4:36 min.) explains how archeologists look for, and dig up, artifacts.
Palmetto Fossil Excursions: Sifting Island
In this video (1:09 min.) see how kids use soil sifters to find fossil shark teeth.
Mathematics and Science Centre (n.d.). Soil Texture Using a Soil Sieve.
Virginia Cooperative Extension (2016). Understanding the Texture of Your Soil for Agricultural Productivity.
References
Mathematics and Science Centre (n.d.). Soil Texture Using a Soil Sieve.
Virginia Cooperative Extension (2016). Understanding the Texture of Your Soil for Agricultural Productivity.