Design & Build a Marble Run
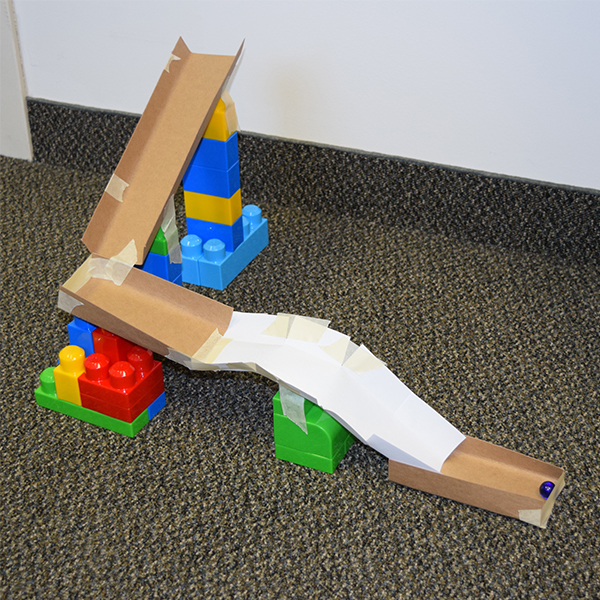
Marble run prototype (© 2019 Let's Talk Science)
Marble run prototype (© 2019 Let's Talk Science)
How does this align with my curriculum?
Students will work collaboratively to design and build a marble run that meets specific criteria.
Overview
Students design and build a marble run that meets specific self-determined criteria.
Timing
60-90 minutes
Setting the Stage
Prior Skills and Knowledge
To successfully participate in this Design & Build, students should be able to work with basic cutting tools (e.g., scissors), fasteners (e.g., various types of tape) and materials (e.g., paper, cardboard, recycled containers) and be familiar with concepts related to relative position and motion. It is recommended that students participate in the It’s All in the Shape Inquiry before doing this Design & Build challenge.
Context
Playgrounds are familiar settings for children. On playground equipment, children can climb, swing and best of all – slide! Slides come in a variety of shapes and sizes from very simple vertical drops, to more elaborate slides with twists and turns.

A marble run is very much like a slide – only instead of children sliding down the structure, a marble rolls down it. Building a marble run is an effective way to explore the concepts of relative position and motion. It is also a great way to get students of all ages involved in an exciting engineering challenge.
In this Design & Build challenge, students will work collaboratively to design and build a build a marble run that meets specific self-determined criteria.
This Design & Build challenge could begin from:
- questions and/or comments that arise from the from the students’ observations while exploring and playing with marbles and ramps. Discuss using questions such as:
- “What do you notice happens to the marble at the end of the ramp? How might you keep that from happening?”
- “What happens to the marble if you make the ramp higher? What about if you make the ramp lower?”
- How could you make the marble roll uphill?”
- exploring a store-bought marble run. Discuss using questions such as:
- “What parts of the marble run make the marble go downwards? What parts make it go upwards?”
- “How does the marble change direction?”
- “Will the marble make it from top to bottom?” “Why do you think so/not think so?”
- “How can we change the design so that the marble rolls faster?”


Design Criteria
As a class, students brainstorm criteria that their prototype marble run must meet. Educators may choose to add other criteria that are curriculum-specific, such as using joiners/fasteners, measuring, using money to purchase materials, etc.
Design criteria examples:
- Use available materials
- Use a minimum of $5.00 and a maximum of $10.00 to purchase materials
- Use a minimum of two different types of joiners/fasteners
- Be free standing
- Change direction a minimum of three times (left-right, up-down)
- Have at least one cross-over point, a minimum of 5 cm above the track
- Come to a complete stop at the end of the course
Details
- clothespins, small
- craft sticks
- cups, assorted, small (e.g., paper, Styrofoam)
- elastic bands, various sizes
- foil, aluminum
- marbles, glass (1 per student group)
- paper (e.g., construction, cardstock, newsprint)
- paper clips
- pipe cleaners
- plates, assorted (e.g., paper, Styrofoam, aluminum)
- play dough
- ruler, 30 cm (12”) length (1 per student group)
- scissors, child-sized (1 per student group)
- straws, drinking
- tape, masking
- tubes, cardboard
- yarn
- cash register, toy (optional)
- pipe insulation (3/4 inch in 3-4 ft lengths) (optional)

- Collect an assortment of found and recycled materials for students to use. The materials list above is only a ‘suggested’ list.
- Determine the required quantities of materials for each working group and organize the materials.
- Option: Provide students with a set amount of play money and set up a ‘store’ area where students can ‘buy’ their materials. This could be included in the design criteria (e.g., you must spend a minimum of $5 and a maximum of $10).
Students develop Design & Build skills as they design, build and test a prototype marble run that causes the marble to move in different directions.
Students will:
- identify the problem to be solved/need to be met
- brainstorm criteria that the prototype must meet
- share their questions and ideas for a solution to the problem/need
- discuss the advantages and disadvantages of each in order to select a potential solution to be tested
- visualize what the solution might look like and make design sketches based on their visualizations
- develop a design plan (e.g., identify the tasks or key steps involved in developing the solution, make decisions about tools and materials that will be needed, including labelled sketches)
- build/develop the design idea based on their sketches and design plan
- test their prototypes based on the design criteria
- modify the prototype and retest it against the design criteria as necessary
- reflect on their results and identify things that could be done to improve their prototypes

Observe and document, using anecdotal comments, photos and/or video recordings, student’s ability to:
- Work Collaboratively – students work collaboratively to complete a task and evaluate their group processes throughout the Design & Build process
- Generate Ideas – students use idea generation skills and strategies, such as brainstorming, to identify possible solutions as well as make decisions about the pros and cons of each solution
- Communicate – students communicate their thinking and learning in words, sketches, photos, videos, etc. (e.g., in identifying the problem, in design plans that include 2D design sketches and key design steps/tasks, in lists of materials/equipment/tools)
- Work Safely – students demonstrate safe practices when using a variety of tools and materials while prototyping
- Test – students use skills of observing and recording data as they test their prototypes
- Reflect – students reflect on the results of their prototype testing and suggest things that they might do differently to improve their prototypes

| Students: Saying, Doing, Representing |
Educator Interactions: Responding, Challenging |
|---|---|
| Students identify and refine the problem to be solved/need to be met. |
|
| Students brainstorm and record criteria for the marble run. |
|
| Students visualize what the solution might look like and make design sketches based on their visualizations. |
|
| Students develop a design plan (e.g., steps in creating a prototype, decisions about tools and materials). |
|
| Students build/develop and test the design idea based on their sketches and design plan (create the prototype). |
|
| Students modify the prototype and retest it against the design criteria as necessary. |
|
| Students reflect on the results of their testing and identify things that could be done differently in the future. |
|
Literacy
- Ask questions (e.g., “Where have you seen something that resembles a marble run in real life?” “What was the most challenging part of creating the marble run?” “What words describe how the marble travelled down the marble run?”)
- Communicate thoughts, feelings and ideas (e.g., while brainstorming criteria for the marble run, in design plans that include 2D design sketches, in an outline of key design steps/tasks and lists of required materials and equipment/tools)
- Work collaboratively to come up with solutions (e.g., how to make the marble change directions, how to support the marble run, who will do which task)
Mathematical Thinking
- Recognize and use 2-D and 3D shapes (e.g., cubes, cylinders, rectangular prisms, triangles)
- Represent using pictures, diagrams, graphs, tables, numbers, words, and/or symbols (e.g., use tables to record data such as how fast the marble goes down the run, measure the length/width/height of the completed marble run)
- Tally the cost of materials to build the marble run (if using play money)
Visual Arts
- Discuss visual design elements that could be included in the marble run design (e.g., colour, shape, texture, form, etc.)
If your students are interested in learning more, the following may provoke their curiosity:
- Design and build another marble run that would include motion in multiple directions (up/down, left/right, over/under). Paper plates make a great curved surface!
- Design and build a roller coaster prototype. It could use toy cars or trains to represent the cars that passengers ride in.
- Challenge students to make – the longest marble run, the slowest marble run (time from top to bottom), a marble run that uses the most different materials, etc.
Massive Marble Run (2014)
5MadMovieMakers (1:53 min.) video of a marble run made with a mix of toys. Built with Thomas the Tank Engine wooden railroad train tracks, Hot Wheels pieces and Quercetti Skyrail Marble Roller Coaster track.
Giant rafting track marble run (2016)
Murmiland (5:37 min.) video showing a wooden marble run in action.
Push and Pull (Lessons)
Students develop and apply Observing, Comparing & Contrasting and Sorting & Classifying skills as they explore the forces of push and pull acting on everyday objects.
How Surfaces Affect Motion (Lessons)
Will it slide or stick? Students conduct a fair test to investigate how different solid surfaces affect the movement of an object on a ramp.
How Can I Go Faster on My Bike? (STEM in Context)
You don’t have to pedal harder to go faster. You just have to understand a little bit about gravity, drag and friction!
Materials
- clothespins, small
- craft sticks
- cups, assorted, small (e.g., paper, Styrofoam)
- elastic bands, various sizes
- foil, aluminum
- marbles, glass (1 per student group)
- paper (e.g., construction, cardstock, newsprint)
- paper clips
- pipe cleaners
- plates, assorted (e.g., paper, Styrofoam, aluminum)
- play dough
- ruler, 30 cm (12”) length (1 per student group)
- scissors, child-sized (1 per student group)
- straws, drinking
- tape, masking
- tubes, cardboard
- yarn
- cash register, toy (optional)
- pipe insulation (3/4 inch in 3-4 ft lengths) (optional)
Preparation
- Collect an assortment of found and recycled materials for students to use. The materials list above is only a ‘suggested’ list.
- Determine the required quantities of materials for each working group and organize the materials.
- Option: Provide students with a set amount of play money and set up a ‘store’ area where students can ‘buy’ their materials. This could be included in the design criteria (e.g., you must spend a minimum of $5 and a maximum of $10).
What to Do
Students develop Design & Build skills as they design, build and test a prototype marble run that causes the marble to move in different directions.
Students will:
- identify the problem to be solved/need to be met
- brainstorm criteria that the prototype must meet
- share their questions and ideas for a solution to the problem/need
- discuss the advantages and disadvantages of each in order to select a potential solution to be tested
- visualize what the solution might look like and make design sketches based on their visualizations
- develop a design plan (e.g., identify the tasks or key steps involved in developing the solution, make decisions about tools and materials that will be needed, including labelled sketches)
- build/develop the design idea based on their sketches and design plan
- test their prototypes based on the design criteria
- modify the prototype and retest it against the design criteria as necessary
- reflect on their results and identify things that could be done to improve their prototypes
Assessment
Observe and document, using anecdotal comments, photos and/or video recordings, student’s ability to:
- Work Collaboratively – students work collaboratively to complete a task and evaluate their group processes throughout the Design & Build process
- Generate Ideas – students use idea generation skills and strategies, such as brainstorming, to identify possible solutions as well as make decisions about the pros and cons of each solution
- Communicate – students communicate their thinking and learning in words, sketches, photos, videos, etc. (e.g., in identifying the problem, in design plans that include 2D design sketches and key design steps/tasks, in lists of materials/equipment/tools)
- Work Safely – students demonstrate safe practices when using a variety of tools and materials while prototyping
- Test – students use skills of observing and recording data as they test their prototypes
- Reflect – students reflect on the results of their prototype testing and suggest things that they might do differently to improve their prototypes
Co-constructed Learning
| Students: Saying, Doing, Representing |
Educator Interactions: Responding, Challenging |
|---|---|
| Students identify and refine the problem to be solved/need to be met. |
|
| Students brainstorm and record criteria for the marble run. |
|
| Students visualize what the solution might look like and make design sketches based on their visualizations. |
|
| Students develop a design plan (e.g., steps in creating a prototype, decisions about tools and materials). |
|
| Students build/develop and test the design idea based on their sketches and design plan (create the prototype). |
|
| Students modify the prototype and retest it against the design criteria as necessary. |
|
| Students reflect on the results of their testing and identify things that could be done differently in the future. |
|
Cross-curricular Connections
Literacy
- Ask questions (e.g., “Where have you seen something that resembles a marble run in real life?” “What was the most challenging part of creating the marble run?” “What words describe how the marble travelled down the marble run?”)
- Communicate thoughts, feelings and ideas (e.g., while brainstorming criteria for the marble run, in design plans that include 2D design sketches, in an outline of key design steps/tasks and lists of required materials and equipment/tools)
- Work collaboratively to come up with solutions (e.g., how to make the marble change directions, how to support the marble run, who will do which task)
Mathematical Thinking
- Recognize and use 2-D and 3D shapes (e.g., cubes, cylinders, rectangular prisms, triangles)
- Represent using pictures, diagrams, graphs, tables, numbers, words, and/or symbols (e.g., use tables to record data such as how fast the marble goes down the run, measure the length/width/height of the completed marble run)
- Tally the cost of materials to build the marble run (if using play money)
Visual Arts
- Discuss visual design elements that could be included in the marble run design (e.g., colour, shape, texture, form, etc.)
Extending the Learning
If your students are interested in learning more, the following may provoke their curiosity:
- Design and build another marble run that would include motion in multiple directions (up/down, left/right, over/under). Paper plates make a great curved surface!
- Design and build a roller coaster prototype. It could use toy cars or trains to represent the cars that passengers ride in.
- Challenge students to make – the longest marble run, the slowest marble run (time from top to bottom), a marble run that uses the most different materials, etc.
Supporting Media
Massive Marble Run (2014)
5MadMovieMakers (1:53 min.) video of a marble run made with a mix of toys. Built with Thomas the Tank Engine wooden railroad train tracks, Hot Wheels pieces and Quercetti Skyrail Marble Roller Coaster track.
Giant rafting track marble run (2016)
Murmiland (5:37 min.) video showing a wooden marble run in action.
Learn More
Push and Pull (Lessons)
Students develop and apply Observing, Comparing & Contrasting and Sorting & Classifying skills as they explore the forces of push and pull acting on everyday objects.
How Surfaces Affect Motion (Lessons)
Will it slide or stick? Students conduct a fair test to investigate how different solid surfaces affect the movement of an object on a ramp.
How Can I Go Faster on My Bike? (STEM in Context)
You don’t have to pedal harder to go faster. You just have to understand a little bit about gravity, drag and friction!