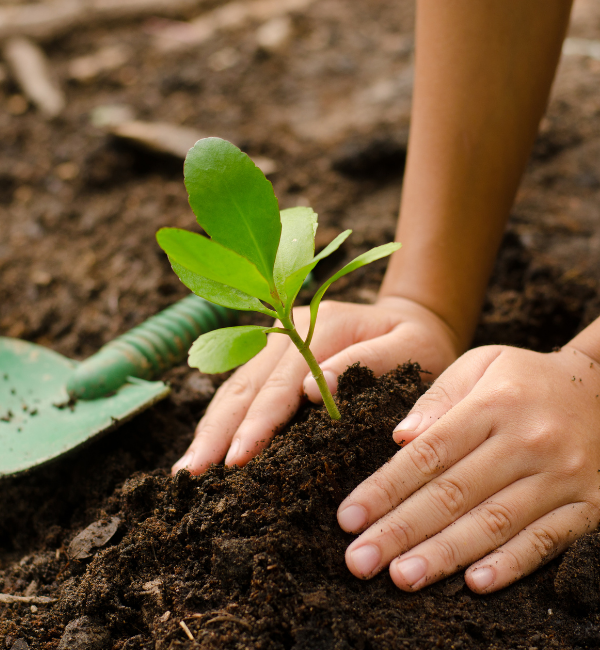
Preserving Paper for the Environment
What happens to the waste that we put in the trash? How are things recycled? In this activity, participants will explore these questions and learn about the 6 R's of Sustainability.
Participants will discuss the impact that landfills have on the environment and how they can help combat climate change. They will also participate in an activity that simulates paper recycling.
This workshop was inspired by the activity submission “Making Old Paper New Again” by Dalhousie University.
This workshop discusses topics, which can lead to feelings of eco-anxiety among volunteers, educators and youth if not presented in a thoughtful manner. The most important things to remember are to be honest, hopeful, developmentally appropriate, and action oriented. This workshop was created with these guidelines in mind. For more details, refer to the volunteer resource, Being Conscious of Eco-Anxiety.
What You Need
Activity 1: The 6 R’s of Sustainability
- Task cards (1 per group)
- Worksheets (1 per group) or large piece of note paper
- Writing utensils (pencils, crayons, markers, etc.)
Activity 2: Paper Recycling
- Scrap paper (the equivalent of ~1.5 sheets of full paper per participant)
- Newspaper (for blotting, ~ 4-6 sheets per participant/piece of paper being created)
- Cloth or fabric (for blotting, ~ 2 pieces per participant/piece of paper being created, the same size of the screen) – can be sourced from old clothes or thrifted!
- Window screening
- Wood frame or old picture frame
- Plastic basin/tub (big enough to fully immerse frame)
- Blender/food processor
- Staples or tacks
- Rolling pin
- Liquid starch (optional)- see recipe instructions below.
- Tablecloth
- Paper Towels
- Cleaning supplies
- Sample finished product
Physical Requirements
- Before the workshop: Inform the educator that it will take anywhere from 12 – 24 hours for the recycled paper to dry. They will need a flat surface to keep their paper undisturbed while it is drying.
- Access to a sink to make clean up easier (recommended).
Guide:
Presentation:
Safety Notes
A volunteer or educator should operate the blender. Do not pour the paper pulp down the sink drain.
What To Do
Introduction
Discuss with the educator beforehand to assess participant’s prior knowledge and adjust the introduction accordingly.
Note: This workshop discusses options of reducing waste that may not be available in all areas and communities. It is important to research what options are available to participants before facilitating this workshop. It is okay to discuss options that are available in other areas, but it is important to acknowledge the differences and adjust the workshop to highlight what actions they can take to limit eco-anxiety.
- Discuss the impact that landfills have on the environment.
- Discuss what happens to the waste at a landfill.
- Explain how landfills contribute to increased greenhouse gas emissions and climate change.
Activity 1: The 6 R’s of Sustainability
What to do
- Separate participants into groups of 2 or 3. Give each group a task card and each group a worksheet or large note paper.
- Each group is tasked with designing a poster that will let the rest of the school/community know about the importance of reducing our waste. Each poster should include/mention:
- At least ONE impact that landfills have on the environment (such as habitat loss, greenhouse gas emissions, toxic waste, climate change, harm to animals, etc.)
- The 6 R’s of Sustainability (Rethink, Repair, Refuse, Reuse, Reduce, Recycle)
- At least ONE action item / idea on how people can live more sustainably.
- Encourage participants to be creative in their action items! Have them think about all the different types of waste that we produce and decide to tackle one area. They can include an idea that already exists (such as one discussed in today’s workshop) or think of something we could start doing!
- Optional: if participants finish their posters early or before everyone has had a chance to do “Activity 2: Paper Recycling”, have participants work on the following reflective exercise “Here’s What!... So What?... Now What?”.
Activity 2: Paper Recycling
What to do
Pre-Activity Prep
- Attach the window screening to the wood frame or old picture frame using staples or tacks.
- Create a sample of the “new” paper to be used as an example.
- Create liquid starch (optional):
- Boil 3.5 cups of water.
- On the side, add ½ cup of water to 1 tablespoon of cornstarch and mix well.
- Slowly add the cornstarch mixture to the boiling water.
- Allow it to cool and place in a watertight container.
Activity Management Notes
This workshop runs best with a minimum of three volunteers:
- One volunteer should be in charge of the blender and helping participants make the pulp.
- One volunteer should help participants strain and flatten the pulp to make paper.
- One volunteer should be available to work with the remaining participants on their poster and answer any questions.
Instructions
- Set up the basin/tub near the sink or on a table with lots of space around (for participants to gather and watch the process).
- Tear all the scrap paper into small pieces.
- The pulp will need to be made in batches.
- One volunteer can help participants make their pulp while the other helps participants with the screen.
- Add some scrap paper to a blender with warm water and some liquid starch. Pulse the blender until the mixture is the consistency of split pea soup (you may have to add more paper or water).
- Place the screen into the basin.
- Pour the pulp into the tub on top of the screen and move it around until the pulp is evenly spread.
- Gently lift the screen out of the basin and allow it to drain for a minute.
- Place the screen on top of a piece of newspaper. Add a piece of cloth on top of the pulp and newspaper over that.
- Use the rolling pin to flatten the pulp that is sandwiched between the cloth and newspaper.
- Take off the top newspaper and flip the screen (with the piece of cloth) attached very carefully.
- Place the screen on top of a few new pieces of newspaper and carefully peel the piece of cloth with the pulp on top the newspaper (pulp side up).
- Add another piece of cloth on top of the pulp, along with another few pieces of newspaper.
- Leave your paper to dry for approximately 12-24 hours. Weigh the paper down with a heavy book to make sure the paper dries flat (optional).
- Once dry, carefully remove the layers of newspaper and peel the cloth to reveal the new paper!
Note: do not pour leftover pulp down the drain! Add left-over to pulp to a compost bin if available. If not, pour it in the garbage bin. Make small batches of pulp to limit the amount of waste at the end.
Wrap-Up
- Discuss how today’s activity connects to how paper is actually recycled (see What’s Happening).
- Review the impact that landfills have on the environment and how they contribute to climate change.
- Discuss the environmental benefits of recycling paper?
- Trees are really important for the environment because they are carbon sinks.
- What else can we do to help reducing the amount of greenhouse gases released into the atmosphere?
- Note: It is important to be conscious of your audience and consider that not all youth have the same options available to choose (i.e. rural students may not have access to public transit, food availability and choices are not always equal). Allow youth to come up with their own ideas instead of directing them on what to do.
- Optional: For older audiences, separate participants into groups and have them think of ways they can reduce or reuse the waste they produce at school. If there is enough time, have the groups share their answers and as a class come up with some steps to meet their goals.
- Discuss possible careers related to the topics discusses in today’s workshop and what participants will need (schooling, experience, etc.) to get into those careers.
Discovery
This activity simulates how paper is recycled in real life! The paper we put in the recycling bin is sorted from the rest of the items. Then, it is sorted based by paper grade or the length of fibres. The paper is shredded and mixed with water and chemicals to make a pulp. The pulp is heated to breakdown the paper into fibers. The pulp goes through multiple processes to remove contaminants, adhesives and sometimes even ink from the paper. The pulp is spun and sent through a machine that adds water and flattens it out. Heated metal rollers dry the paper into rolls to be made into new products.
In our activity, we used a blender to break up our pulp and did not add any chemicals – which is why our new paper has a different texture than regular recycled paper. We also didn’t use heated rollers to dry our paper – which is why it took so long. Imagine how much space and time it would take if we left all the recycled paper to air dry!
Trees are carbon sinks- which mean that they breathe in carbon dioxide (a greenhouse gas) and breath out oxygen and store carbon. Recycling paper reduces waste, reduces greenhouse gas emissions and extends the life of wood that is harvested.
Not all materials can be recycled and not all recyclable materials can be recycled efficiently. It is important to try to utilize other ways of handling waste, such as composting organic materials and reuse items to reduce the amount of waste sent to landfills. This will help lower greenhouse gas emissions and protect the Earth from climate change. It will also help keep our neighbourhoods, air and water clean.
- Volunteers should discuss with the educator ways to use their new recycled paper after the workshop. For example, they can use their paper to make a holiday card, a craft or maybe use it for an upcoming assignment!
- For younger audiences, this activity can be done as a demonstration of how paper is recycled instead of having each participant go through the process of creating their own piece of paper.
- The United Nations Sustainable Development Goals (SDGs) are calls to action to make the world a better place. It calls to “end poverty and inequality, protect the planet and ensure that all people enjoy health, justice and prosperity”. In this workshop, participants explore topics that relate to the following SDGs:
- SDG # 11 – Sustainable Cities and Communities
- SDG # 12 – Responsible Consumption and Production
- SDG # 13 – Climate Action
Explore the United Nations Website to learn more about the Sustainable Development Goals.
- Optional: For older participants, instead of having them develop a poster about sustainability, have them explore the How Do Landfills Work? Animated Guide and other resources to learn more about how landfills operate and methods used to reduce the impact that landfills have on the environment, including:
- Converting gas produced at the landfill into energy.
- Monitoring groundwater for contaminants.
- Collecting and treating leachate (toxic waste).
Then, they can use what they have learned to design the “best landfill ever” that takes into account the 6 R’s of Sustainability.
- The Environmental Impact of Wasted Food (STEM in Context) – Learn about the environmental consequences of food waste, and what you can do about it.
- Polystyrene: The Pros, the Cons, the Chemistry (STEM in Context) – Learn the organic chemistry behind the very useful plastic.
- What are Carbon Offsets? (STEM in Context) – Can carbon offsets help you reduce your environmental footprint, practice sustainable living and fight climate change?
- Cows, Methane and Climate Change (STEM in Context) – How do beef and dairy cows contribute to climate change? Livestock agriculture is a source of methane, a powerful greenhouse gas.
What's Happening?
This activity simulates how paper is recycled in real life! The paper we put in the recycling bin is sorted from the rest of the items. Then, it is sorted based by paper grade or the length of fibres. The paper is shredded and mixed with water and chemicals to make a pulp. The pulp is heated to breakdown the paper into fibers. The pulp goes through multiple processes to remove contaminants, adhesives and sometimes even ink from the paper. The pulp is spun and sent through a machine that adds water and flattens it out. Heated metal rollers dry the paper into rolls to be made into new products.
In our activity, we used a blender to break up our pulp and did not add any chemicals – which is why our new paper has a different texture than regular recycled paper. We also didn’t use heated rollers to dry our paper – which is why it took so long. Imagine how much space and time it would take if we left all the recycled paper to air dry!
Why Does it Matter?
Trees are carbon sinks- which mean that they breathe in carbon dioxide (a greenhouse gas) and breath out oxygen and store carbon. Recycling paper reduces waste, reduces greenhouse gas emissions and extends the life of wood that is harvested.
Not all materials can be recycled and not all recyclable materials can be recycled efficiently. It is important to try to utilize other ways of handling waste, such as composting organic materials and reuse items to reduce the amount of waste sent to landfills. This will help lower greenhouse gas emissions and protect the Earth from climate change. It will also help keep our neighbourhoods, air and water clean.
Investigate Further
- Volunteers should discuss with the educator ways to use their new recycled paper after the workshop. For example, they can use their paper to make a holiday card, a craft or maybe use it for an upcoming assignment!
- For younger audiences, this activity can be done as a demonstration of how paper is recycled instead of having each participant go through the process of creating their own piece of paper.
- The United Nations Sustainable Development Goals (SDGs) are calls to action to make the world a better place. It calls to “end poverty and inequality, protect the planet and ensure that all people enjoy health, justice and prosperity”. In this workshop, participants explore topics that relate to the following SDGs:
- SDG # 11 – Sustainable Cities and Communities
- SDG # 12 – Responsible Consumption and Production
- SDG # 13 – Climate Action
Explore the United Nations Website to learn more about the Sustainable Development Goals.
- Optional: For older participants, instead of having them develop a poster about sustainability, have them explore the How Do Landfills Work? Animated Guide and other resources to learn more about how landfills operate and methods used to reduce the impact that landfills have on the environment, including:
- Converting gas produced at the landfill into energy.
- Monitoring groundwater for contaminants.
- Collecting and treating leachate (toxic waste).
Then, they can use what they have learned to design the “best landfill ever” that takes into account the 6 R’s of Sustainability.
- The Environmental Impact of Wasted Food (STEM in Context) – Learn about the environmental consequences of food waste, and what you can do about it.
- Polystyrene: The Pros, the Cons, the Chemistry (STEM in Context) – Learn the organic chemistry behind the very useful plastic.
- What are Carbon Offsets? (STEM in Context) – Can carbon offsets help you reduce your environmental footprint, practice sustainable living and fight climate change?
- Cows, Methane and Climate Change (STEM in Context) – How do beef and dairy cows contribute to climate change? Livestock agriculture is a source of methane, a powerful greenhouse gas.