Design & Build a Non-Slip Boot Tread
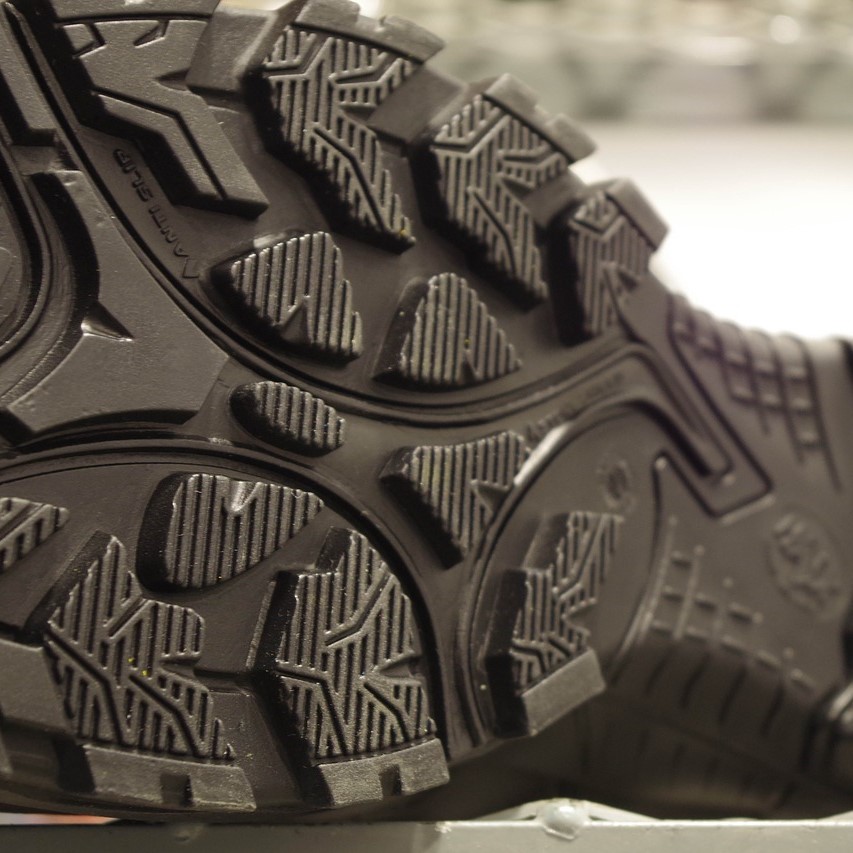
Shoe tread (aligraham, Pixabay)
Shoe tread (aligraham, Pixabay)
How does this align with my curriculum?
Students work collaboratively to design and build a boot tread that will use friction to prevent slipping on an incline.
Overview
Students develop their Design & Build skills as they design and build a boot tread that will use friction to prevent slipping on an incline of 30 degrees while supporting a load of 500 grams.
Timing
50-60 minutes
Setting the Stage
Prior Skills and Knowledge
To successfully participate in this lesson, students should be able to work with basic cutting tools (e.g., scissors), fasteners (e.g., glue, tape) and materials (e.g., paper, sandpaper, elastics and felt) and be familiar with the concept of sliding friction. It is recommended that students participate in the How Surfaces Affect Motion lesson before doing this Design & Build lesson.
Context
Shoe sole design is big business – for sports, safety, winter boots, general public and worker safety and winter fun. Designers often look to nature to find inspiration for types of materials and shapes and forms of materials that help provide or overcome friction.
Friction is the force that resists motion. Understanding friction and its application is very important in the design of safety gear such as work boots and gloves. Designers need to ensure that their products provide sufficient grip to prevent slips and falls and to maintain a secure hold when climbing or working with tools and materials.
In this Design & Build challenge, students will develop their Design & Build skills as they design and build a boot tread that will prevent slipping on an incline of 30 degrees while supporting a load of 500 grams.
This design and build could begin from:
- Questions and/or comments that arise after students view pictures or videos of different sports in action (e.g., winter sports like curling, where the footwear consists of a slipper and a gripper shoe; summer track and field sports that include running shoes with cleats; outdoor adventure shoes for hiking and rock climbing). (Note: This lesson could be used to support learning coinciding with major sporting events, such as the winter/summer Olympic Games.) Discuss using questions such as:
“What kind of footwear do athletes wear when they are participating in that sport? Why do you think the athletes chose them? Do you think those athletes want their feet to slide or stay in place?”

- exploring rubbings from the treads of different shoes that the students have made in class or at home. Discuss using questions such as:
- “That’s an unusual tread marking. What type of footwear do you think that comes from?”
- “Why do you think (point to a specific detail) this tread detail might be important?"
- “What do the patterns in the tread remind you of?”
- “How does the spacing of treads differ between types of shoes?”
- “In what ways does the pattern relate to the function of the shoe?

- Comparing the treads on footwear with the paws of different animals. Discuss using questions such as:
- “What do you notice about the patterns on shoe treads? How does this compare to the patterns we see on animal feet or paws?”
- “Why do animals need to have these adaptations on their feet? Why do humans create technologies to give us better grip or slip?”

Design Criteria:
Design criteria examples:
- Treads are made to a standard size using a template
- Tread materials used in the design are obtained from the materials provided
- Tread will remain stationary on a ramp that is positioned at 30 degrees with a load of 500 grams applied
Details
- Full-sized outline of boot tread (at least 1 per group)
- Construction paper, cardstock or cardboard (at least 1 per group)
- Sandpaper of different grits
- Rubber bands of different sizes
- String
- Yarn
- Cording
- Felt, scraps of fabric
- Craft foam
- Sponges
- Bandage strips
- Fine gravel
- Carpet pieces
- 1-1.5 m long board or shelf (to use as a ramp for testing)
- Glue
- Tape (e.g. masking tape, duct tape, packing tape)
- Scissors
- Collect an assortment of recycled and new materials that students will use to construct the prototype boot treads.
- Set up material sourcing stations, organized by type of material. Alternately, organize an assortment of materials to provide to students.
Students develop and apply Design & Build skills as they design, build and test a boot tread that will remain stationary on a ramp that is positioned at 30 degrees with a load of 500 grams applied.
Students will follow the steps of the Design & Build process:
- identify the problem to be solved/need to be met
- brainstorm criteria that the prototype must meet
- share their questions and ideas for a solution to the problem/need
- discuss the advantages and disadvantages of each in order to select a potential solution to be tested
- visualize what the solution might look like and make design sketches based on their visualizations
- develop a design plan (e.g., identify the tasks or key steps involved in developing the solution, make decisions about tools and materials that will be needed, including labelled sketches)
- build/develop the design idea based on the design plan
- test their prototypes based on the design criteria
- modify the prototype and retest it against the design criteria as necessary
- reflect on their results and identify things that could be done to improve their prototypes
- Work Collaboratively – students work collaboratively to complete a task and evaluate their group processes throughout the Design & Build process
- Generate Ideas – students use idea generation skills and strategies, such as brainstorming, to identify possible solutions as well as make decisions about the pros and cons of each solution
- Communicate – students communicate their thinking and learning in words, sketches, photos, videos, etc. (e.g., in identifying the problem, in design plans that include 2D design sketches and key design steps/tasks, in lists of materials/equipment/tools)
- Work Safely – students demonstrate safe practices when using a variety of tools and materials while prototyping
- Test – students use skills of observing and recording data as they test their prototypes
- Reflect – students reflect on the results of their prototype testing and suggest things that they might do differently to improve their prototypes
| Students: Saying, Doing, Representing |
Educator: Interactions: Responding, Challenging |
|---|---|
| Students identify and refine the problem to be solved/need to be met. |
|
| Students brainstorm and record criteria for the no-slip tread. |
|
| Students visualize what the solution might look like and make design sketches based on their visualizations. |
|
| Students develop a design plan (e.g., steps in creating a prototype, decisions about tools and materials). |
|
| Students build/develop and test the design idea based on their sketches and design plan (create the prototype). |
|
| Students modify the prototype and retest it against the design criteria as necessary. |
|
| Students reflect on the results of their testing and identify things that could be done differently in the future. |
|
Literacy
- Ask questions (“What are the features of this shoe tread?” “Why would someone need a tread like this?”, etc.)
- Communicate thoughts, feelings and ideas (e.g., while brainstorming criteria for the prototype, in design plans that include 2D design sketches, in an outline of key design steps/tasks and lists of required materials and equipment/tools)
- Listen to the ideas of others (e.g., work collaboratively to come up with solutions to the design challenge)
Mathematical Thinking
- Recognize and use 2D and 3D shapes (e.g., use a pattern of triangular shapes) to fashion the treads
- Represent using pictures, diagrams, graphs, tables, numbers, words, and/or symbols (e.g., sketch a visualization of how the shoe tread will meet the established criteria; use tables to record testing and redesigns of the shoe tread)
- Measure (e.g., the load in grams the shoe tread can hold)
Visual Arts
- Discuss and apply visual design elements (e.g., how to include shape, texture, form in the design of the tread)
- Communicate for different audiences and different purposes through the arts (e.g., discuss appealing to a specific audience with their shoe tread design by creating a commercial and formulating a sales pitch about the features, advantages and benefits of the shoe tread to a potential customer)
If your students are interested in learning more, the following may provoke their curiosity:
- Add an entrepreneurial aspect to the design & build challenge by providing groups with play money and assigning values to the materials that they will then purchase to build their boot tread. Cost can then be used as one of the design criteria (i.e., a cheaper design that meets the other criteria would rank higher than a more expensive design).
- Challenge the students to retest the treads they have designed using increasingly heavier loads or on the ability of the treads to remain stationary on a steeper incline or different surface.
- Explore how investigators use the characteristics of footprints (e.g., make and model identification, tread pattern, shoe size, wear patterns, estimating the height and weight of the wearer) at a crime scene to identify and make connections with potential suspects or witnesses.


- How Surfaces affect Motion (Let's Talk Science Lesson)
Students use the skills of predicting and planning a fair test to investigate how different solid surfaces affect the movement of an object on a ramp. This is a good inquiry to precede this Design & Build a Boot Tread design and build. - The Fastest Sled Ride Ever! (SciShow Kids video on YouTube)
An introduction to friction in the context of sledding. - Slipping, Sliding Science! | Physics for Kids (Video on YouTube)
What’s better than slipping and sliding in your backyard on a hot summer day? It’s so much fun! But, how does this fun happen? It has a little something to do with friction! - Friction is a Force (Video on YouTube)
Jared discusses friction and then uses blocks on a ramp to show us the effects of different surfaces.
How Can I Go Faster on My Bike? (STEM in Context)
You don’t have to pedal harder to go faster. You just have to understand a little bit about gravity, drag and friction!
How do an Airplane's Tires Help It Land Safely? (STEM in Context)
Manufacturing and engineering airplane tires is important work! Learn how airplane tires keep the aircraft safe during takeoff and landing.
Materials
- Full-sized outline of boot tread (at least 1 per group)
- Construction paper, cardstock or cardboard (at least 1 per group)
- Sandpaper of different grits
- Rubber bands of different sizes
- String
- Yarn
- Cording
- Felt, scraps of fabric
- Craft foam
- Sponges
- Bandage strips
- Fine gravel
- Carpet pieces
- 1-1.5 m long board or shelf (to use as a ramp for testing)
- Glue
- Tape (e.g. masking tape, duct tape, packing tape)
- Scissors
Preparation
- Collect an assortment of recycled and new materials that students will use to construct the prototype boot treads.
- Set up material sourcing stations, organized by type of material. Alternately, organize an assortment of materials to provide to students.
What to Do
Students develop and apply Design & Build skills as they design, build and test a boot tread that will remain stationary on a ramp that is positioned at 30 degrees with a load of 500 grams applied.
Students will follow the steps of the Design & Build process:
- identify the problem to be solved/need to be met
- brainstorm criteria that the prototype must meet
- share their questions and ideas for a solution to the problem/need
- discuss the advantages and disadvantages of each in order to select a potential solution to be tested
- visualize what the solution might look like and make design sketches based on their visualizations
- develop a design plan (e.g., identify the tasks or key steps involved in developing the solution, make decisions about tools and materials that will be needed, including labelled sketches)
- build/develop the design idea based on the design plan
- test their prototypes based on the design criteria
- modify the prototype and retest it against the design criteria as necessary
- reflect on their results and identify things that could be done to improve their prototypes
Assessment
- Work Collaboratively – students work collaboratively to complete a task and evaluate their group processes throughout the Design & Build process
- Generate Ideas – students use idea generation skills and strategies, such as brainstorming, to identify possible solutions as well as make decisions about the pros and cons of each solution
- Communicate – students communicate their thinking and learning in words, sketches, photos, videos, etc. (e.g., in identifying the problem, in design plans that include 2D design sketches and key design steps/tasks, in lists of materials/equipment/tools)
- Work Safely – students demonstrate safe practices when using a variety of tools and materials while prototyping
- Test – students use skills of observing and recording data as they test their prototypes
- Reflect – students reflect on the results of their prototype testing and suggest things that they might do differently to improve their prototypes
Co-constructed Learning
| Students: Saying, Doing, Representing |
Educator: Interactions: Responding, Challenging |
|---|---|
| Students identify and refine the problem to be solved/need to be met. |
|
| Students brainstorm and record criteria for the no-slip tread. |
|
| Students visualize what the solution might look like and make design sketches based on their visualizations. |
|
| Students develop a design plan (e.g., steps in creating a prototype, decisions about tools and materials). |
|
| Students build/develop and test the design idea based on their sketches and design plan (create the prototype). |
|
| Students modify the prototype and retest it against the design criteria as necessary. |
|
| Students reflect on the results of their testing and identify things that could be done differently in the future. |
|
Cross-curricular Connections
Literacy
- Ask questions (“What are the features of this shoe tread?” “Why would someone need a tread like this?”, etc.)
- Communicate thoughts, feelings and ideas (e.g., while brainstorming criteria for the prototype, in design plans that include 2D design sketches, in an outline of key design steps/tasks and lists of required materials and equipment/tools)
- Listen to the ideas of others (e.g., work collaboratively to come up with solutions to the design challenge)
Mathematical Thinking
- Recognize and use 2D and 3D shapes (e.g., use a pattern of triangular shapes) to fashion the treads
- Represent using pictures, diagrams, graphs, tables, numbers, words, and/or symbols (e.g., sketch a visualization of how the shoe tread will meet the established criteria; use tables to record testing and redesigns of the shoe tread)
- Measure (e.g., the load in grams the shoe tread can hold)
Visual Arts
- Discuss and apply visual design elements (e.g., how to include shape, texture, form in the design of the tread)
- Communicate for different audiences and different purposes through the arts (e.g., discuss appealing to a specific audience with their shoe tread design by creating a commercial and formulating a sales pitch about the features, advantages and benefits of the shoe tread to a potential customer)
Extending the Learning
If your students are interested in learning more, the following may provoke their curiosity:
- Add an entrepreneurial aspect to the design & build challenge by providing groups with play money and assigning values to the materials that they will then purchase to build their boot tread. Cost can then be used as one of the design criteria (i.e., a cheaper design that meets the other criteria would rank higher than a more expensive design).
- Challenge the students to retest the treads they have designed using increasingly heavier loads or on the ability of the treads to remain stationary on a steeper incline or different surface.
- Explore how investigators use the characteristics of footprints (e.g., make and model identification, tread pattern, shoe size, wear patterns, estimating the height and weight of the wearer) at a crime scene to identify and make connections with potential suspects or witnesses.
Supporting Media
- How Surfaces affect Motion (Let's Talk Science Lesson)
Students use the skills of predicting and planning a fair test to investigate how different solid surfaces affect the movement of an object on a ramp. This is a good inquiry to precede this Design & Build a Boot Tread design and build. - The Fastest Sled Ride Ever! (SciShow Kids video on YouTube)
An introduction to friction in the context of sledding. - Slipping, Sliding Science! | Physics for Kids (Video on YouTube)
What’s better than slipping and sliding in your backyard on a hot summer day? It’s so much fun! But, how does this fun happen? It has a little something to do with friction! - Friction is a Force (Video on YouTube)
Jared discusses friction and then uses blocks on a ramp to show us the effects of different surfaces.
Learn More
How Can I Go Faster on My Bike? (STEM in Context)
You don’t have to pedal harder to go faster. You just have to understand a little bit about gravity, drag and friction!
How do an Airplane's Tires Help It Land Safely? (STEM in Context)
Manufacturing and engineering airplane tires is important work! Learn how airplane tires keep the aircraft safe during takeoff and landing.