Design & Build a Floating Device
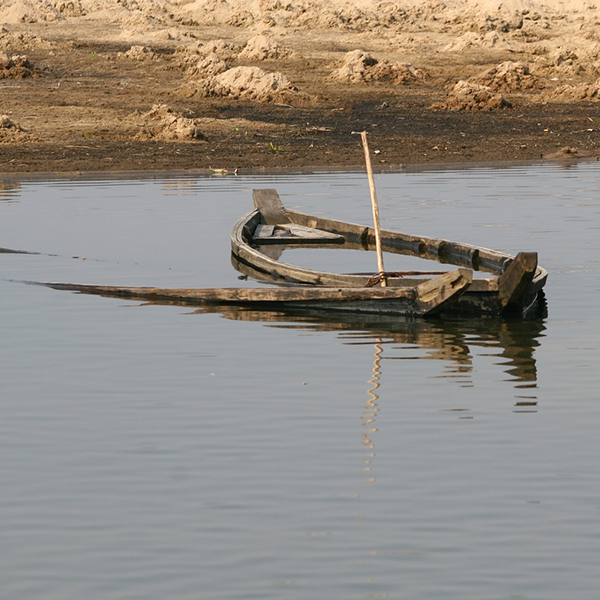
Sunken boat (ASM Asaduzzaman, Pixabay)
Sunken boat (ASM Asaduzzaman, Pixabay)
How does this align with my curriculum?
Students work collaboratively to design and build a floating device.
Overview
Students develop their Design & Build skills as they apply their prior knowledge to design and build a device that floats.
Timing
45-60 minutes
Setting the Stage
To successfully participate in this lesson, students should be able to work with basic cutting tools (e.g., scissors), fasteners (e.g., low-temperature glue guns, tape) and materials (e.g., wooden craft sticks, straws) and be familiar with the concepts of buoyancy (sink and float) and strong shapes. It is recommended that students participate in one or more of the following lessons before doing this technological problem-solving challenge:
Context:
Students may have various experiences with sinking and floating. They may have tossed small rocks into a pond, played with toys in a bathtub or a sink, or watched boats of various sizes float on the water. Indeed, many will have had the experience of floating when they learned to swim.
In this challenge, students will develop their Design & Build skills as they apply their prior knowledge to design and build a device that floats.
This design and build could begin from:
- a series of pictures. Discuss using questions such as:
- “Where might you find the first device? Who might use this device and for what purpose?”
- “Where might you find the second device? Who might use this device and for what purpose?”
- "What other devices can you think of the serve a similar purpose?"


- a challenge to students to find objects and/or materials (e.g., plasticine) in the room that they think will float. Discuss using questions such as:
- “Why did you choose that item/material?” (e.g., prior knowledge of its ability to float)
- “How can we test our items to see if they will float?”
- “Is it possible to make something float that sank during our tests? Why do you think that?”

- reading a book such as Iggy Peck, Architect. Discuss using questions such as:
- “What is the problem facing Iggy Peck and his class?”
- “What skills does Iggy have that might help to solve the problem?”
- “If you were Iggy, what solutions might you suggest for getting everyone safely off the island?”

Design Criteria:
As a class, students brainstorm criteria that their prototype device must meet. Educators may choose to add other criteria that are curriculum-specific, such as using joiners/fasteners, measuring, using specific materials, etc.
Design criteria examples:
- Device must be created using only the materials provided.
- Device must support a weight of XX grams.
- Device must stay afloat for a minimum of xx minutes.
Details
- Access to water
- fasteners such as masking and/or duct tape, wood glue or a low temperature glue gun, etc.
- cutting tools such as scissors, Easy Cutters, etc.
- metre stick
- container of coins or small cubes equalling the determined mass the device must support
- aluminum foil
- modeling clay
- craft/popsicle sticks (200 per team)
- Styrofoam (trays, cups, or plates, and/or egg cartons)
- plastic containers (recycled)
- cardboard (recycled boxes or scraps)
- different kinds of paper (recycled where possible)
- straws
- Collect an assortment of recycled and new materials that students will use to construct the prototype device. The materials list above is only a suggested list.
- Set up material sourcing stations, organized by type of material. Alternatively, organize an assortment of materials to be provided.
- For testing the devices, set up a classroom sink with some water (8-10 cm) or set up a testing station using a rectangular tub with water. Provide paper towels nearby to clean up any drips or spills.
- Students who have not previously learned about forces may need to do some research prior to engaging in this design challenge (e.g., buoyancy as a force)
Students develop and apply Design & Build skills as they design, build and test a device that will float.
Students will follow the steps of the Design & Build process:
- identify the problem to be solved/need to be met
- brainstorm criteria that the prototype must meet
- share their questions and ideas for a solution to the problem
- discuss the advantages and disadvantages of each in order to select a potential solution to be tested
- visualize what the solution might look like and make design sketches based on their visualizations
- develop a design plan (e.g., identify the tasks or key steps involved in developing the solution; make decisions about tools and materials that will be needed; include labelled sketches)
- build/develop the design idea based on the design plan
- test their prototypes based on the design criteria
- modify the prototype and retest it against the design criteria as necessary
- reflect on their results and identify things that could be done to improve their prototypes
Observe and document, using anecdotal comments, photos and/or video recordings, students’ ability to:
- Work Collaboratively – students work collaboratively to complete a task and evaluate their group processes throughout the Design & Build process
- Generate Ideas – students use idea generation skills and strategies, such as brainstorming, to identify possible solutions as well as make decisions about the pros and cons of each solution
- Communicate – students communicate their thinking and learning in words, sketches, photos, videos, etc. (e.g., in identifying the problem, in design plans that include 2D design sketches and key design steps/tasks, in lists of materials/equipment/tools)
- Work Safely – students demonstrate safe practices when using a variety of tools and materials while prototyping
- Test – students use skills of observing and recording data as they test their prototypes
- Reflect – students reflect on the results of their prototype testing and suggest things that they might do differently to improve their prototypes
| Students: Saying, Doing, Representing |
Educator: Interactions: Responding, Challenging |
|---|---|
| Students identify and refine the problem to be solved/need to be met. |
|
| Students brainstorm and record criteria for the solution they have chosen. |
|
| Students visualize what the solution might look like and make design sketches based on their visualizations. |
|
| Students develop a design plan (e.g., steps in creating a prototype, decisions about tools and materials). |
|
| Students build/develop and test the design idea based on their sketches and design plan (create the prototype). |
|
| Students modify the prototype and retest it against the design criteria as necessary. |
|
| Students reflect on the results of their testing and identify things that could be done differently in the future. |
|
Literacy
- Ask questions (e.g., “What problem are we trying to solve?”)
- Communicate thoughts, feelings and ideas (e.g., while brainstorming solutions for the problem, in design plans that include 2D design sketches, in an outline of key design steps/tasks and lists of required materials and equipment/tools)
- Work collaboratively to come up with solutions (e.g., how to determine the most feasible solution to the problem)
Mathematical Thinking
- Recognize and use 2D and 3D shapes (e.g., use cylinders as a base for their device)
- Represent using pictures, diagrams, graphs, tables, numbers, words, and/or symbols (e.g., sketch their visualization of how their device might meet the established criteria; use tables to record tests and redesigns of their toy)
- Measure and record the mass (e.g., to ensure that their device will support the required mass and stay afloat)
If your students are interested in learning more, the following may provoke their curiosity:
- Read the book Abel’s Island by William Steig. Discuss using questions such as:
- “Although Abel is a mouse, his experiences are similar to those of Iggy Peck and his classmates. What characteristics does Abel have that are similar to those of Iggy?”
- “When did Abel have to think like an engineer?”
- “What skills does Abel have that helped him survive on the island?”
- “What could Abel have learned from Iggy Peck about getting off of the island”
- “How did Abel make connections between his previous experiences and his new situation?”
- Some students may be interested in learning more about big ships and how they are built so that they will stay afloat. This video, How Do Ships Float?, provides some easily-accessed information.


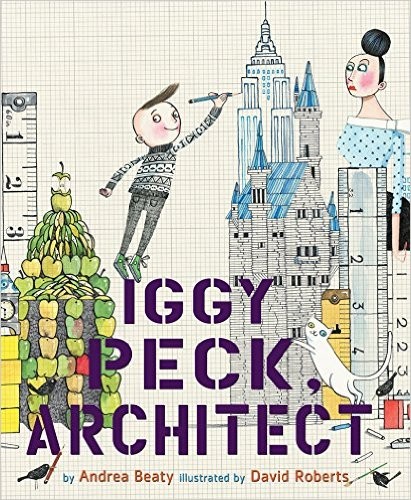
Iggy Peck, Architect
by Andrea Beatty
Iggy has one passion: building. When his second-grade teacher declares her dislike of architecture, Iggy faces a challenge.
ISBN: 9780810911062

Abel's Island
by William Steig
The story of a mouse who gets swept onto an island in a big storm and has to fend for himself in this new environment
ISBN: 9780241894774
Objects that Float (Picture Set)
How Do Ships Float? MITK12Videos (Video)
The technology that keeps huge cargo ships afloat is amazingly simple. PJ, a masters student in Naval Construction and Engineering at MIT, explains just how simple it really is.
Why do Ships Float? (STEM in Context)
Have you ever been on a ship and wondered how you’re staying afloat? The answer is buoyancy!
How can I make an egg float? (Hands-on Activities)
In this challenge activity find out if you can get an egg to float. Learn how the density of matter affects the buoyancy of objects.
How can I engineer a raft so that it holds the most weight? (Hands-on Activities)
Explore the forces of gravity and buoyancy while designing a raft to hold the most weight possible.
Materials
- Access to water
- fasteners such as masking and/or duct tape, wood glue or a low temperature glue gun, etc.
- cutting tools such as scissors, Easy Cutters, etc.
- metre stick
- container of coins or small cubes equalling the determined mass the device must support
- aluminum foil
- modeling clay
- craft/popsicle sticks (200 per team)
- Styrofoam (trays, cups, or plates, and/or egg cartons)
- plastic containers (recycled)
- cardboard (recycled boxes or scraps)
- different kinds of paper (recycled where possible)
- straws
Preparation
- Collect an assortment of recycled and new materials that students will use to construct the prototype device. The materials list above is only a suggested list.
- Set up material sourcing stations, organized by type of material. Alternatively, organize an assortment of materials to be provided.
- For testing the devices, set up a classroom sink with some water (8-10 cm) or set up a testing station using a rectangular tub with water. Provide paper towels nearby to clean up any drips or spills.
- Students who have not previously learned about forces may need to do some research prior to engaging in this design challenge (e.g., buoyancy as a force)
What to Do
Students develop and apply Design & Build skills as they design, build and test a device that will float.
Students will follow the steps of the Design & Build process:
- identify the problem to be solved/need to be met
- brainstorm criteria that the prototype must meet
- share their questions and ideas for a solution to the problem
- discuss the advantages and disadvantages of each in order to select a potential solution to be tested
- visualize what the solution might look like and make design sketches based on their visualizations
- develop a design plan (e.g., identify the tasks or key steps involved in developing the solution; make decisions about tools and materials that will be needed; include labelled sketches)
- build/develop the design idea based on the design plan
- test their prototypes based on the design criteria
- modify the prototype and retest it against the design criteria as necessary
- reflect on their results and identify things that could be done to improve their prototypes
Assessment
Observe and document, using anecdotal comments, photos and/or video recordings, students’ ability to:
- Work Collaboratively – students work collaboratively to complete a task and evaluate their group processes throughout the Design & Build process
- Generate Ideas – students use idea generation skills and strategies, such as brainstorming, to identify possible solutions as well as make decisions about the pros and cons of each solution
- Communicate – students communicate their thinking and learning in words, sketches, photos, videos, etc. (e.g., in identifying the problem, in design plans that include 2D design sketches and key design steps/tasks, in lists of materials/equipment/tools)
- Work Safely – students demonstrate safe practices when using a variety of tools and materials while prototyping
- Test – students use skills of observing and recording data as they test their prototypes
- Reflect – students reflect on the results of their prototype testing and suggest things that they might do differently to improve their prototypes
Co-constructed Learning
| Students: Saying, Doing, Representing |
Educator: Interactions: Responding, Challenging |
|---|---|
| Students identify and refine the problem to be solved/need to be met. |
|
| Students brainstorm and record criteria for the solution they have chosen. |
|
| Students visualize what the solution might look like and make design sketches based on their visualizations. |
|
| Students develop a design plan (e.g., steps in creating a prototype, decisions about tools and materials). |
|
| Students build/develop and test the design idea based on their sketches and design plan (create the prototype). |
|
| Students modify the prototype and retest it against the design criteria as necessary. |
|
| Students reflect on the results of their testing and identify things that could be done differently in the future. |
|
Cross-curricular Connections
Literacy
- Ask questions (e.g., “What problem are we trying to solve?”)
- Communicate thoughts, feelings and ideas (e.g., while brainstorming solutions for the problem, in design plans that include 2D design sketches, in an outline of key design steps/tasks and lists of required materials and equipment/tools)
- Work collaboratively to come up with solutions (e.g., how to determine the most feasible solution to the problem)
Mathematical Thinking
- Recognize and use 2D and 3D shapes (e.g., use cylinders as a base for their device)
- Represent using pictures, diagrams, graphs, tables, numbers, words, and/or symbols (e.g., sketch their visualization of how their device might meet the established criteria; use tables to record tests and redesigns of their toy)
- Measure and record the mass (e.g., to ensure that their device will support the required mass and stay afloat)
Extending the Learning
If your students are interested in learning more, the following may provoke their curiosity:
- Read the book Abel’s Island by William Steig. Discuss using questions such as:
- “Although Abel is a mouse, his experiences are similar to those of Iggy Peck and his classmates. What characteristics does Abel have that are similar to those of Iggy?”
- “When did Abel have to think like an engineer?”
- “What skills does Abel have that helped him survive on the island?”
- “What could Abel have learned from Iggy Peck about getting off of the island”
- “How did Abel make connections between his previous experiences and his new situation?”
- Some students may be interested in learning more about big ships and how they are built so that they will stay afloat. This video, How Do Ships Float?, provides some easily-accessed information.
Supporting Media
Iggy Peck, Architect
by Andrea Beatty
Iggy has one passion: building. When his second-grade teacher declares her dislike of architecture, Iggy faces a challenge.
ISBN: 9780810911062
Abel's Island
by William Steig
The story of a mouse who gets swept onto an island in a big storm and has to fend for himself in this new environment
ISBN: 9780241894774
Objects that Float (Picture Set)
How Do Ships Float? MITK12Videos (Video)
The technology that keeps huge cargo ships afloat is amazingly simple. PJ, a masters student in Naval Construction and Engineering at MIT, explains just how simple it really is.
Learn More
Why do Ships Float? (STEM in Context)
Have you ever been on a ship and wondered how you’re staying afloat? The answer is buoyancy!
How can I make an egg float? (Hands-on Activities)
In this challenge activity find out if you can get an egg to float. Learn how the density of matter affects the buoyancy of objects.
How can I engineer a raft so that it holds the most weight? (Hands-on Activities)
Explore the forces of gravity and buoyancy while designing a raft to hold the most weight possible.